

I felt that for this month’s food buzz 24X24 it would be nice to introduce the cuisine from Kerala, my birth place. Unlike other Indian cooking it is not popularized in Indian restaurant abroad. Kerala has its own language, Malayalam, and a cuisine influenced by locally available ingredients such as rice, coconut, plantains, tapioca, jackfruit, mango, Gambooge / kodampuli etc.
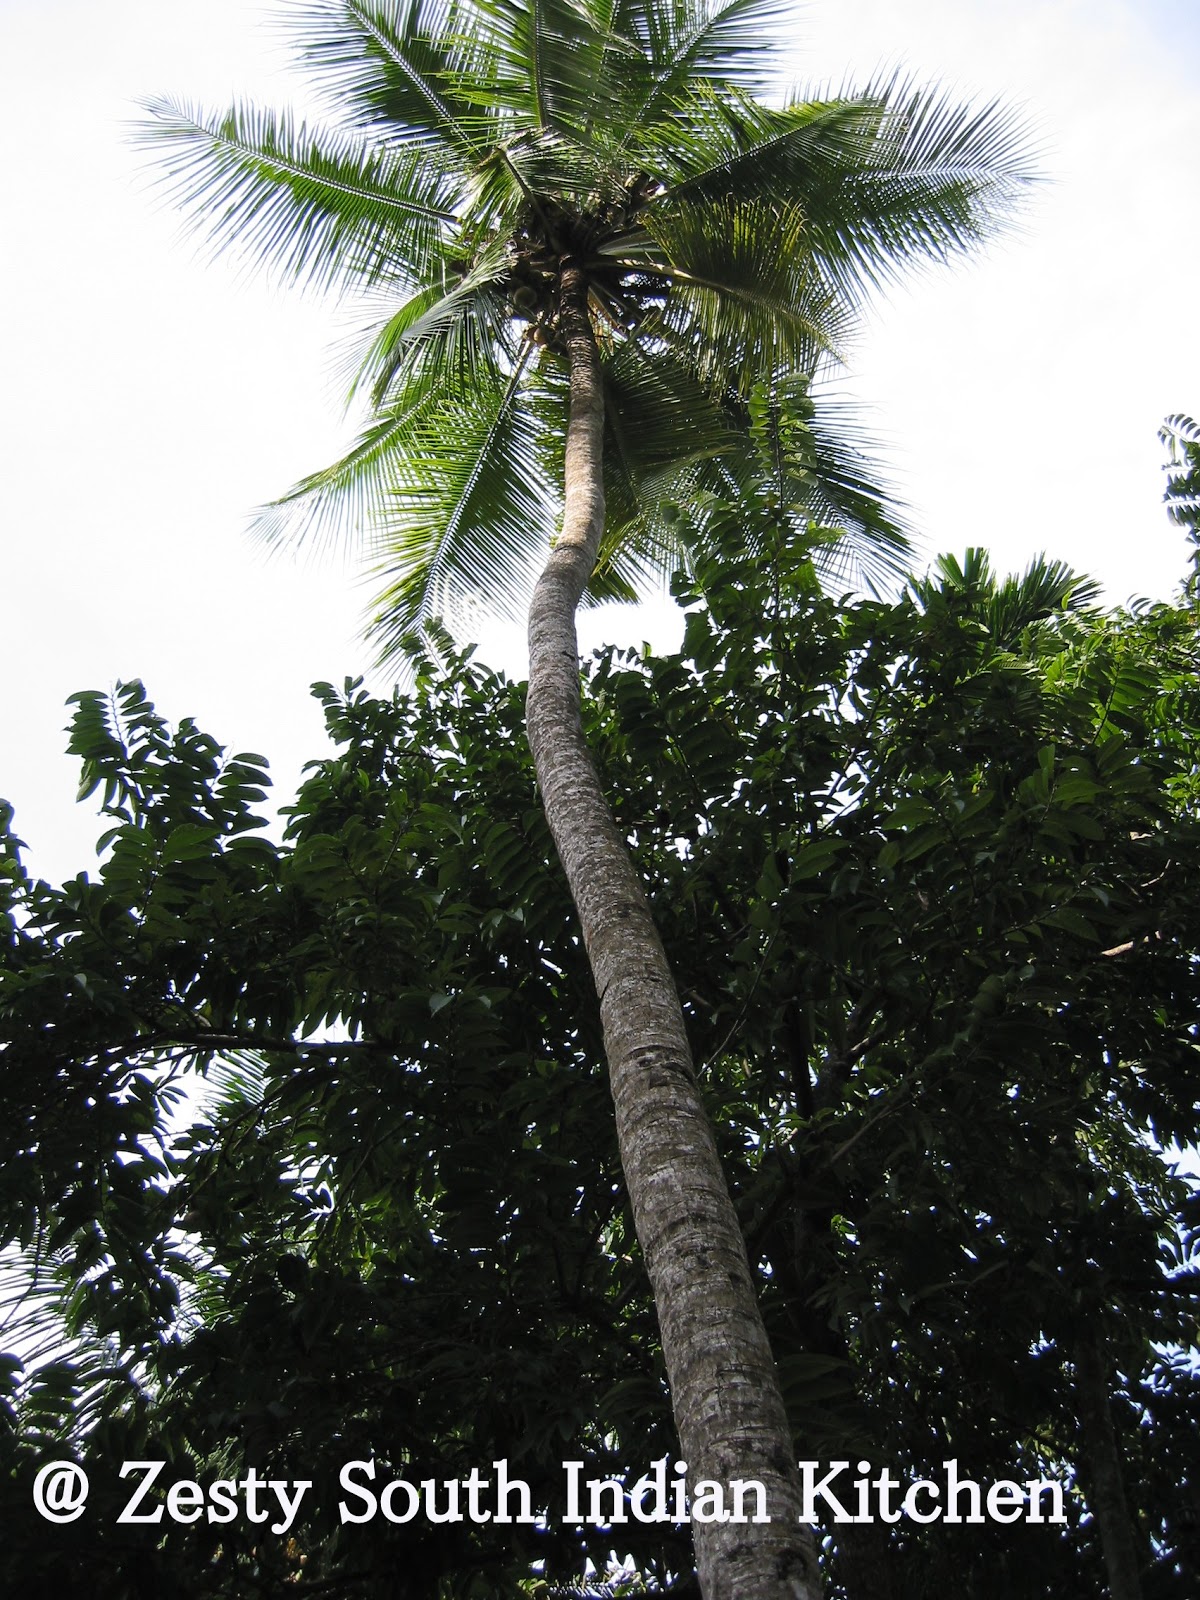
Kerala is also known as “Gods own country” for its beautiful beaches, backwaters, beautiful Asian elephants and luscious coconut trees. It is considered to be one of the best tourist locations in India. Even National Geographic named that 50 greatest destination of world. Life fast and moving at the speed of light anywhere else in world, where in Kerala it is slow, moving leisurely.


It is also the land of spices. Kerala has a long history of trade in the spices, with the Dutch, Portuguese and British coming to India attracted by spices from Kerala, especially black pepper. It is also one of rare state in India where all the 3 major religions (Hinduism, Christianity and Islam) being practiced by approx 30%. It is also the state where St. Thomas the Apostle, one of the twelve disciples of Jesus, landed in 52 A.D. He preached the Gospel, organized Christian communities in several places and established seven churches in Kerala and then at last got martyrdom in Mylapore, Chennai, in 72 A.D. It also where Ayurvedic medicine originated and practiced till date.
Even though Kerala cuisine doesn’t have a starter, or a salad, it has complete meal with equal amount of nutritional components like carbohydrates and proteins. It is also gluten free. Vegetarian dishes are mildly spiced compared to non-vegetarians counter parts. Just like Thai cuisine, it heavily uses entire coconut, coconut milk and uses coconut oil like Philippines. Other part of India people likes to eat white rice or basmati along with wheat where as in Kerala people like to use parboiled red rice called rose matta. It tastes really nutty and chewy compared to Basmati. Raw red rice is used to make desserts and famous breakfast dish like puttu (Steamed rice cake/ muffins), Appam (pancake), Dosa (Rice and lentil Crepe) etc. Most famous breakfast is puttu- Kadala (steamed rice cake, chana dal curry), Appam – Mutta curry (Egg curry), Idiyappam-vegetable ishtu( vegetable-stew) and Pathiri ( flat bread made with rice) –mutton curry. Breakfast dishes uses less oil, however it contains coconut or coconut milk.
Some time breakfast will be simple as rice porridge (kanji) and moong beans cooked with coconut and spices ( payrau).
Although rice is major carbohydrate sources, we also like to use Tapioca (cassava) as the second important starch. It usually consumed with spicy relish made with small onion and red chili if you are vegetarian, non-veggies consume with fish curry.
Lunch and dinners are usually elaborate with parboiled rice as main dishes with two- three sides. Side dishes will be of two kinds; one will ozhichu kootan /curry (meaning liquid /wet curry) which is mixed with rice and also act as a binder. Then other one will be dry curries such as thoran /Upperi and Mezhukupruatti.Thoran (stir fry) always contains seasoning like, urad dal, mustard seeds, curry leaves and coconut with touch of cumin where as Mezhukupuratti contains only seasoning and curry leaves no coconut but coconut oil is used. Curry leaves are another essential part of Kerala cooking including all southern and western Indian cooking. They are usually toasted along with seasoning and curry leaves tend to realize volatile oils and give a nice flavor. Even though Gourmetsleuth.comsays it can substitute with kaffir lime leaves or basil leaves I can’t agree with it. Curry leaves have distinct flavor and aroma also supposed to be help in digestion.
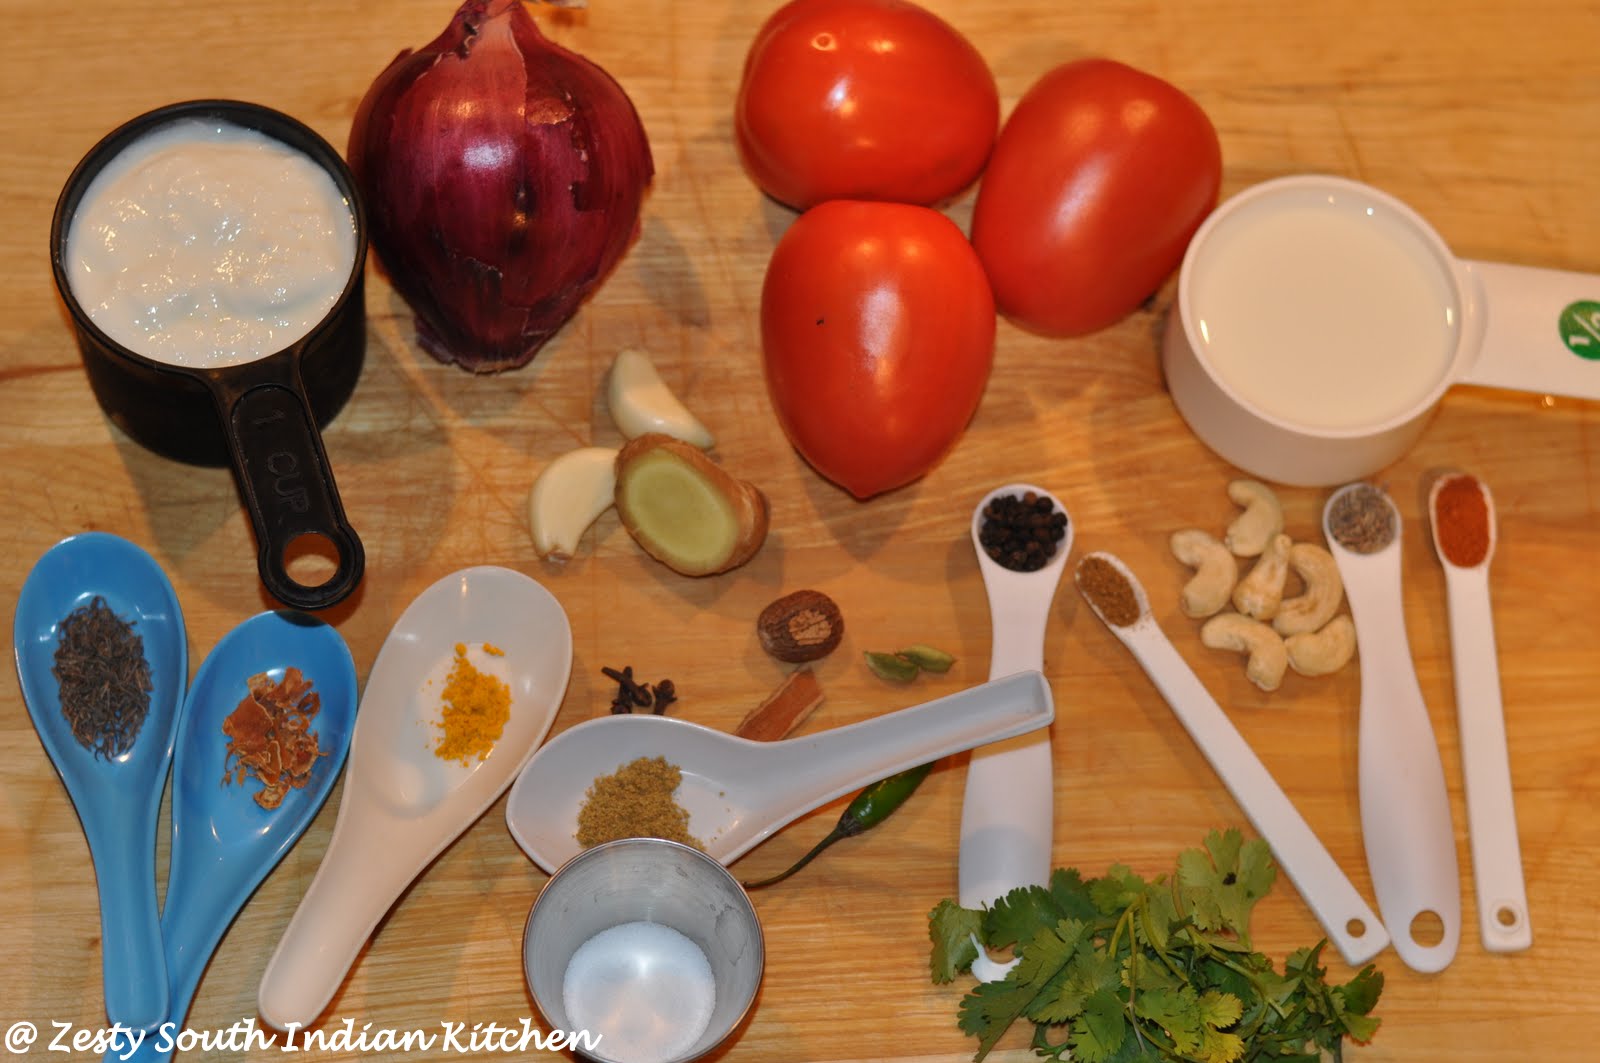
Wet curries are usually made with vegetables coconut gravy either spiced with green chili or red chili. Some time ginger and garlic is used. However, its non-vegetarian counterpart contains coriander, garm masala, ginger, garlic and red chili powder. Souring agents like tamarind, Gambooge / kodampuli etc. is used to make sea food curries. Where as in chicken and other meat no souring agent is used, exception is there when they use vinegar and lemon juice. Some time they are made with simple ingredients like onion, shallots, ginger, garlic, green chili, red chili powder, and coriander and garm masala with or without coconut milk.
Among the sea food, fish and prawns are used as curries compared to mussels and oysters. Fish fried and curry with red hot chili powder is most common in local booze shops: Toddy (Toddy made from coconut sap) also Arrack. If you want a really spicy fish curry, duck roast, pork roast with boiled or mashed tapioca then you need to visit these shops. Nowadays not only guys who buys booze goes to these shop, even there is a separate section of families who come to taste these delicacies.
Kerala cuisine also has myriad of vegetarian dishes, such as aviyal,thoran, mezhukupuratti, pachadi,kichadi,theeyal, sambhar, rasamMoru curry ( yogurt curry) , pulisseryetc. Our grand feast Sadhya always has sweet, sour, bitter, acidic, spicy and salty tasting curries.
Our pickles are spicy and rich in sesame oil and salt so that it can remain at room temperature without any preservative. Pickles are made with raw mango, lemon/limeand goose berries. Non-vegetarian versions include fish and meat pickle.
There are no cold desserts; but we have warm desserts called payasam or pradhaman. There are lots of varieties such as one with rice and milk(Pal Payasam), rice flakes (Palada pradhaman), channa dal, jaggery (unrefined sugar similar to Mexican Panela) and coconut milk (kadala parippu Pradhaman) my hubby’s favorite. We also make Payasam or pradhaman with jackfruit, mango, pineapple etc.
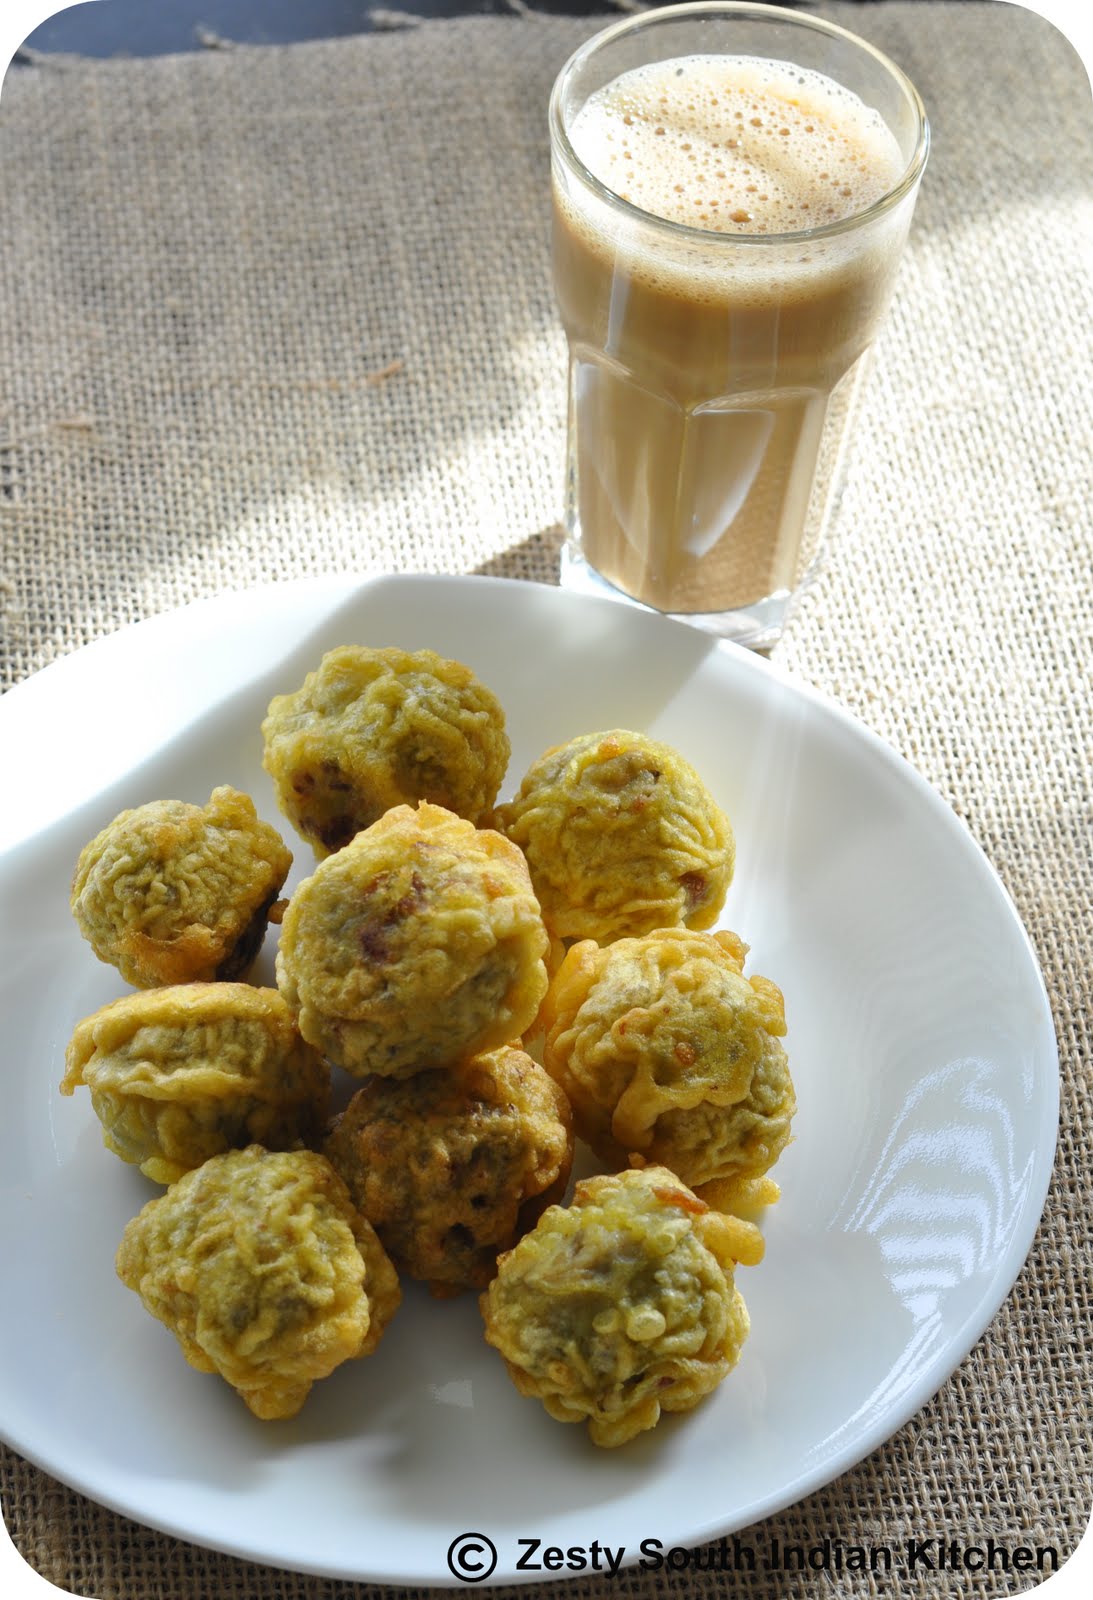
Drinks commonly found in Kerala are buttermilk drink (Sambaram) spiced with green chili, ginger and curry leaves, lemon juice and also boiled water with herbs called Karingali vellam/ Chukku Vellam/ Dahashamani. It is only Indian state where people drink boiled water.
5-10 varieties of banana and plantains are found in Kerala. The major banana types being Dwarf Cavendish, Apple banana, burro bananas, plantains etc. other fruits includes, Two types of Jackfruit, Koozha chakka, the fruits of which have small, fibrous, soft, mushy, but very sweet carpel where as other one will be more important commercially, with crisp carpers of high quality known as Varika. There are also 4-6 varieties of mango and the other custard apple, guava, papaya, cashew fruit.
Vanilla bean, ginger, cardamom, cinnamon, black pepper, nutmeg, star anise, bay leaf , Cloves, Thyme, Basil, Mint, Sage, Rosemary and Oregano etc whatever spice you name it you can find there except all spice. In addition spices there are coffee and tea plantation in Kerala.
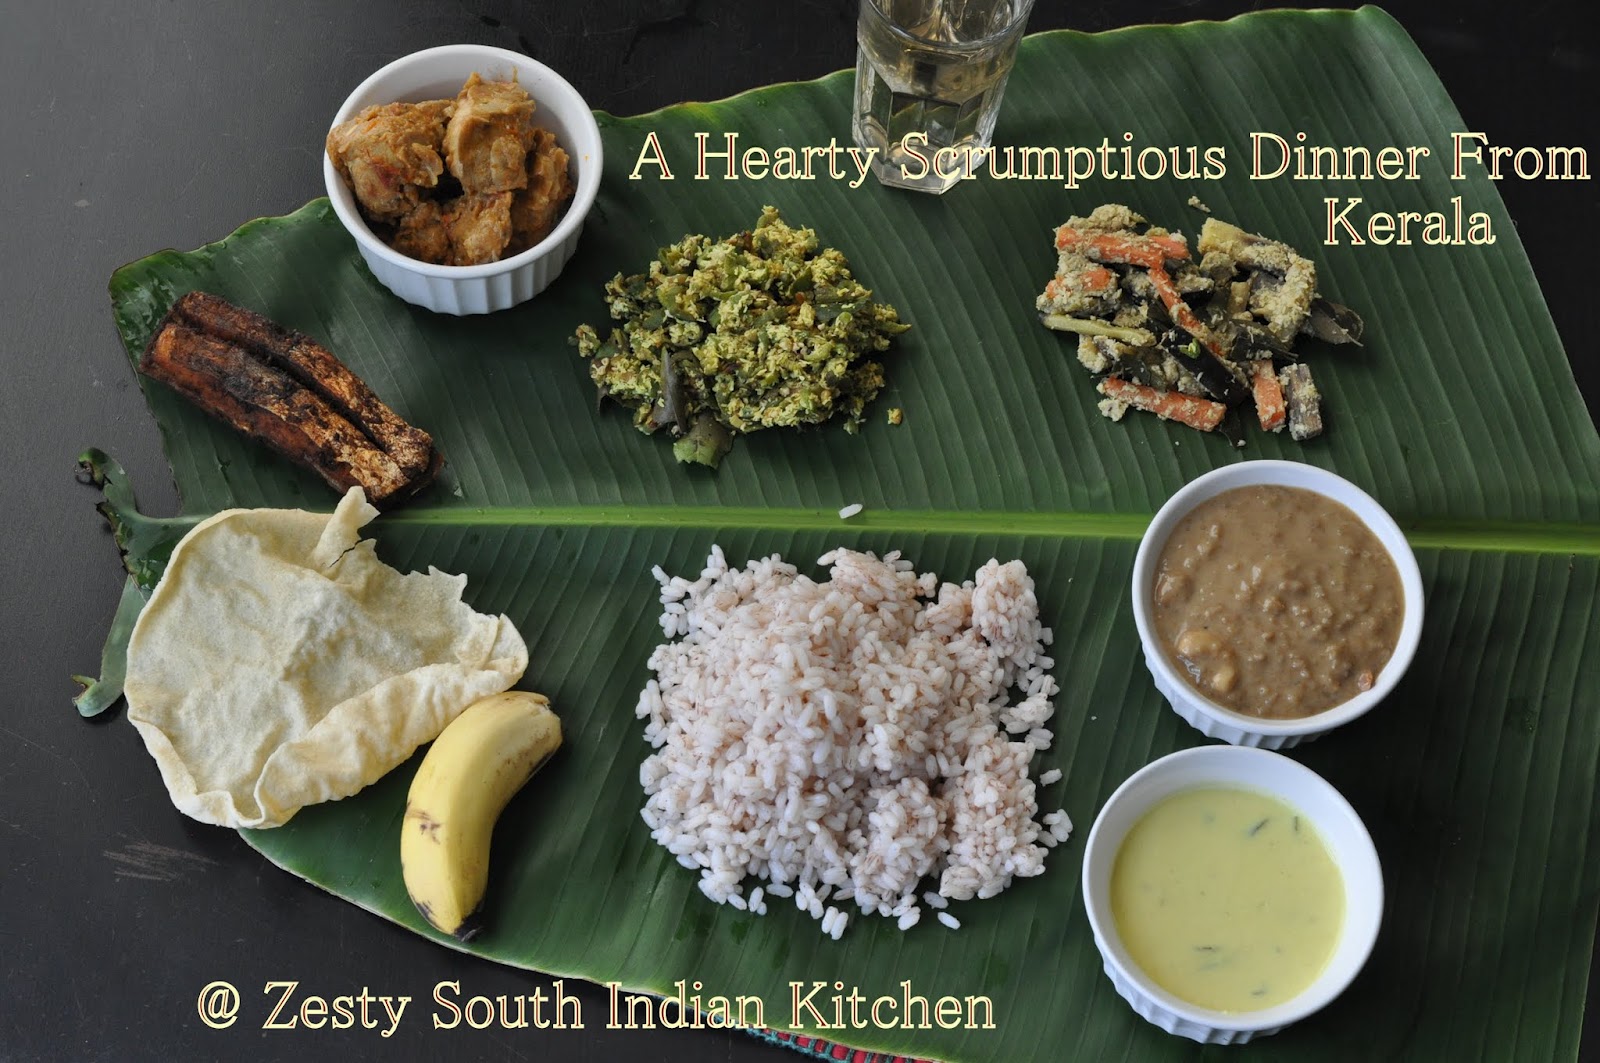
So in order to give an overall outlook of what I explained here I selected the following menu.
Main
Choru (cooked Red parboiled rice)

Sides
Moru curry (Spicy yogurt curry cooked with coconut and spices)

Aviyal(Mixed vegetables cooked with coconut, cumin and green chili)

Vendakka Thoran ( Okra stir-fry with touch of coconut and spices)

Non vegetarian
Fish fry ( Pomfert cooked with homemade spices) Recipe follows

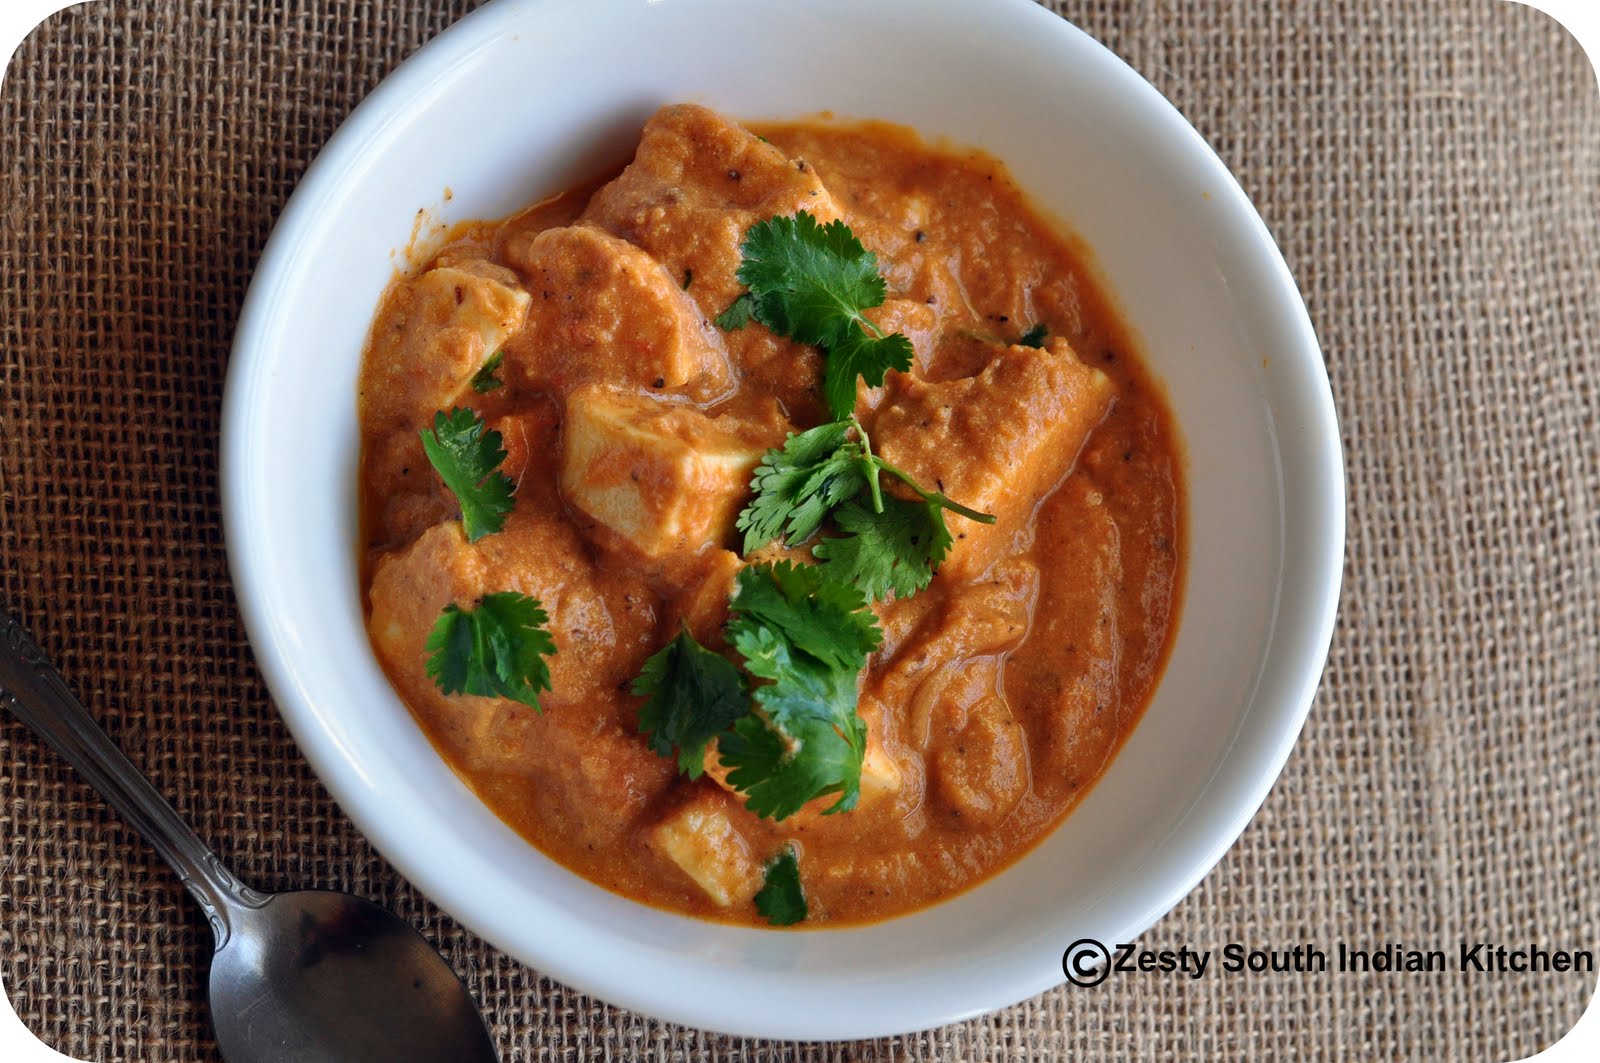
Chicken curry (Chicken cooked with coconut and spices) Recipe follows

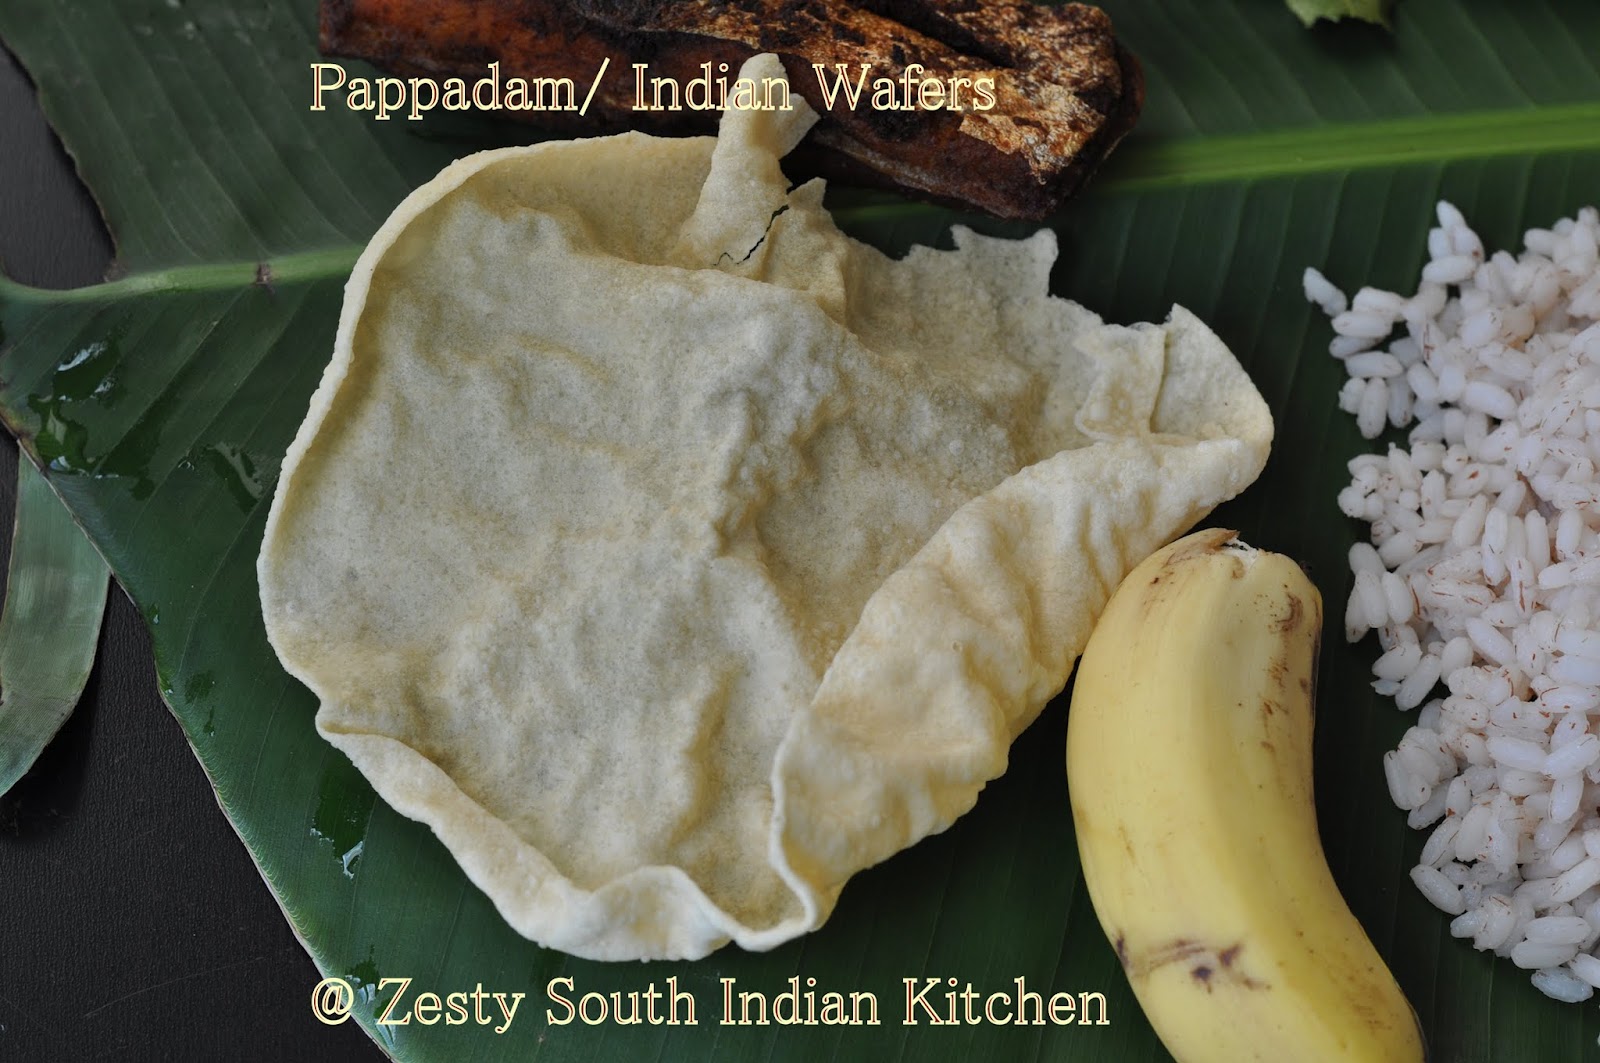
Pappadam (Indian Wafers) & Poovan pazham (Apple banana)
Dessert
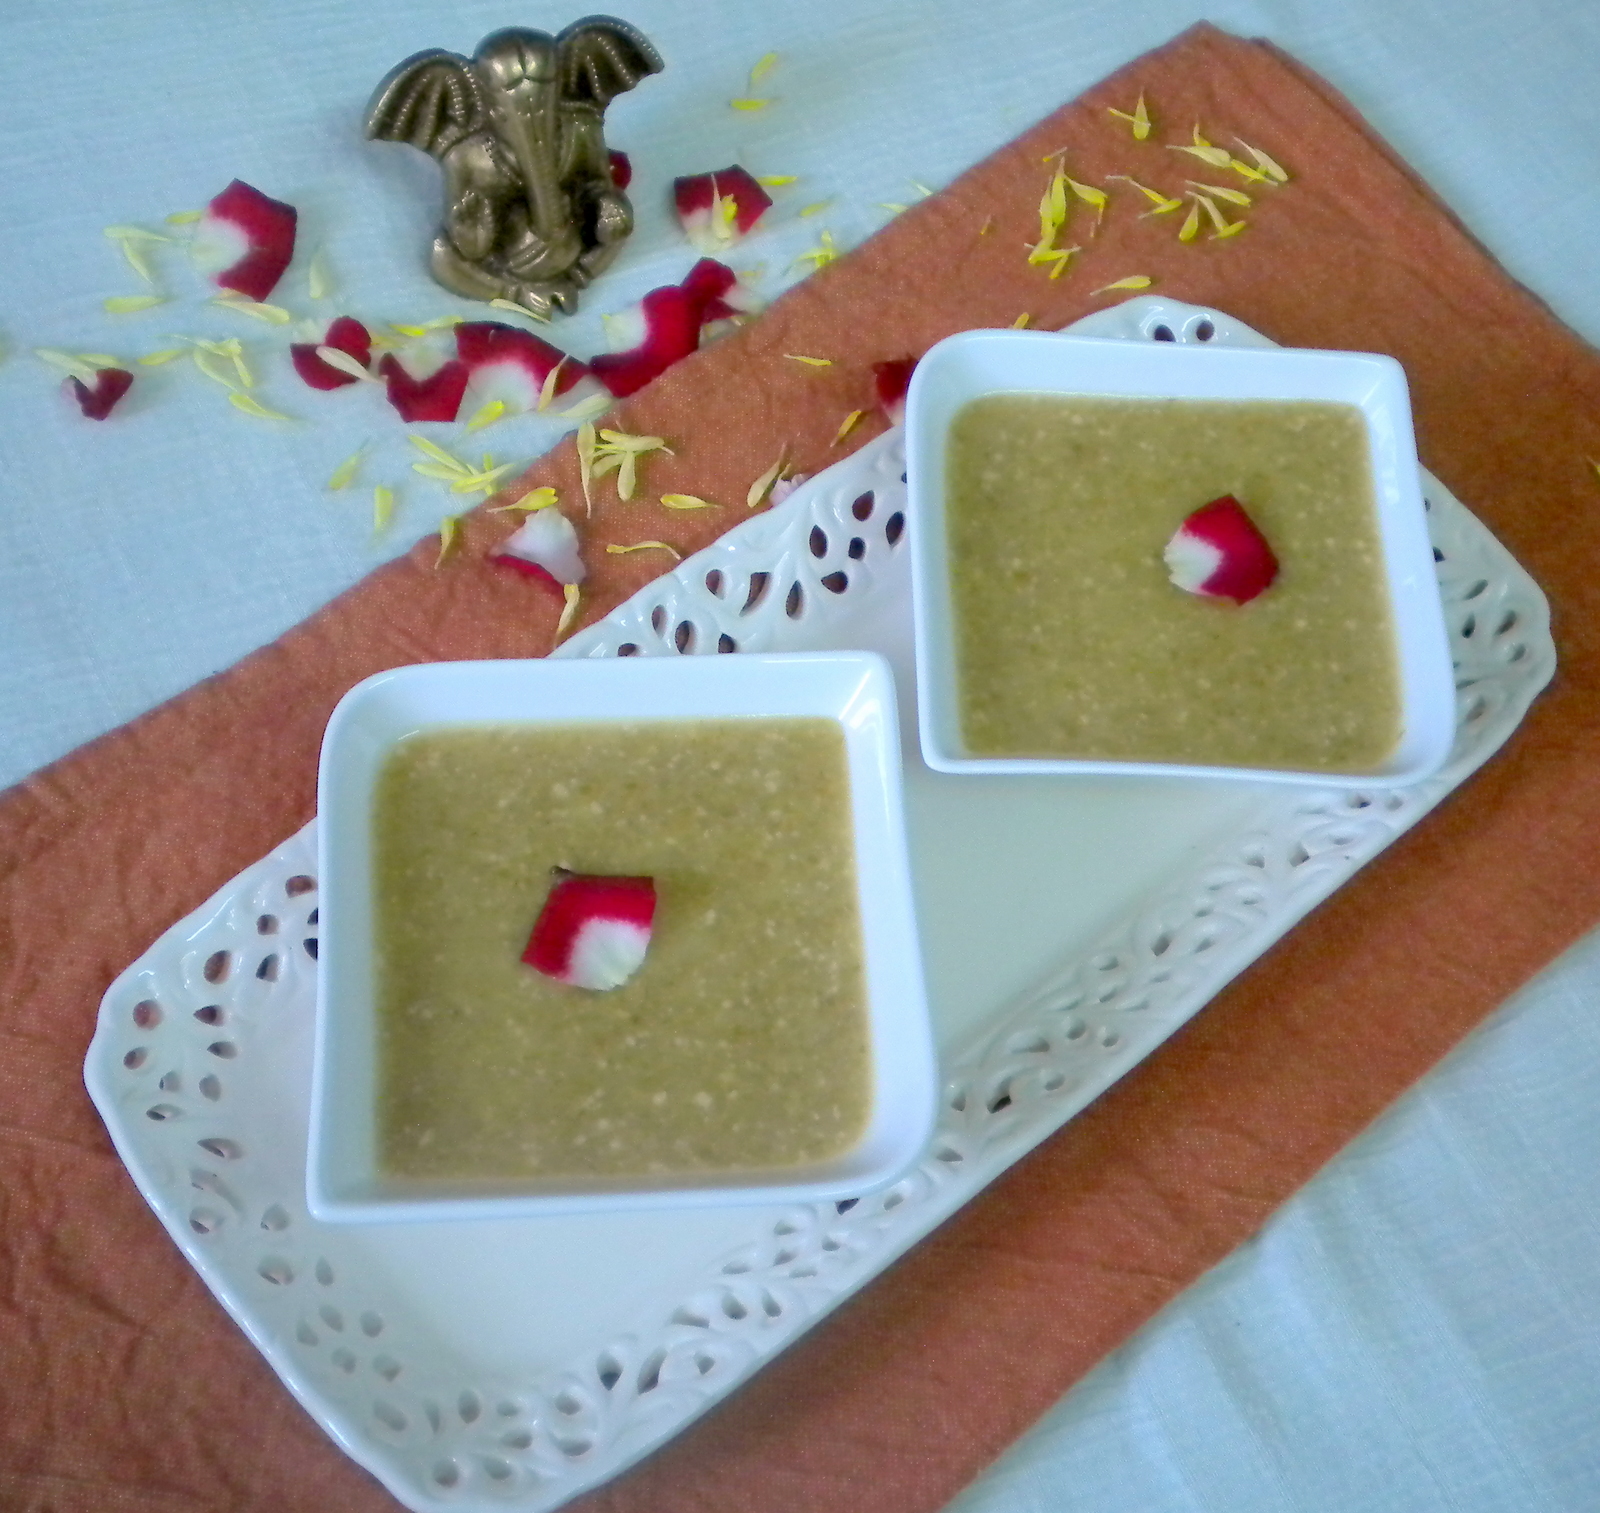
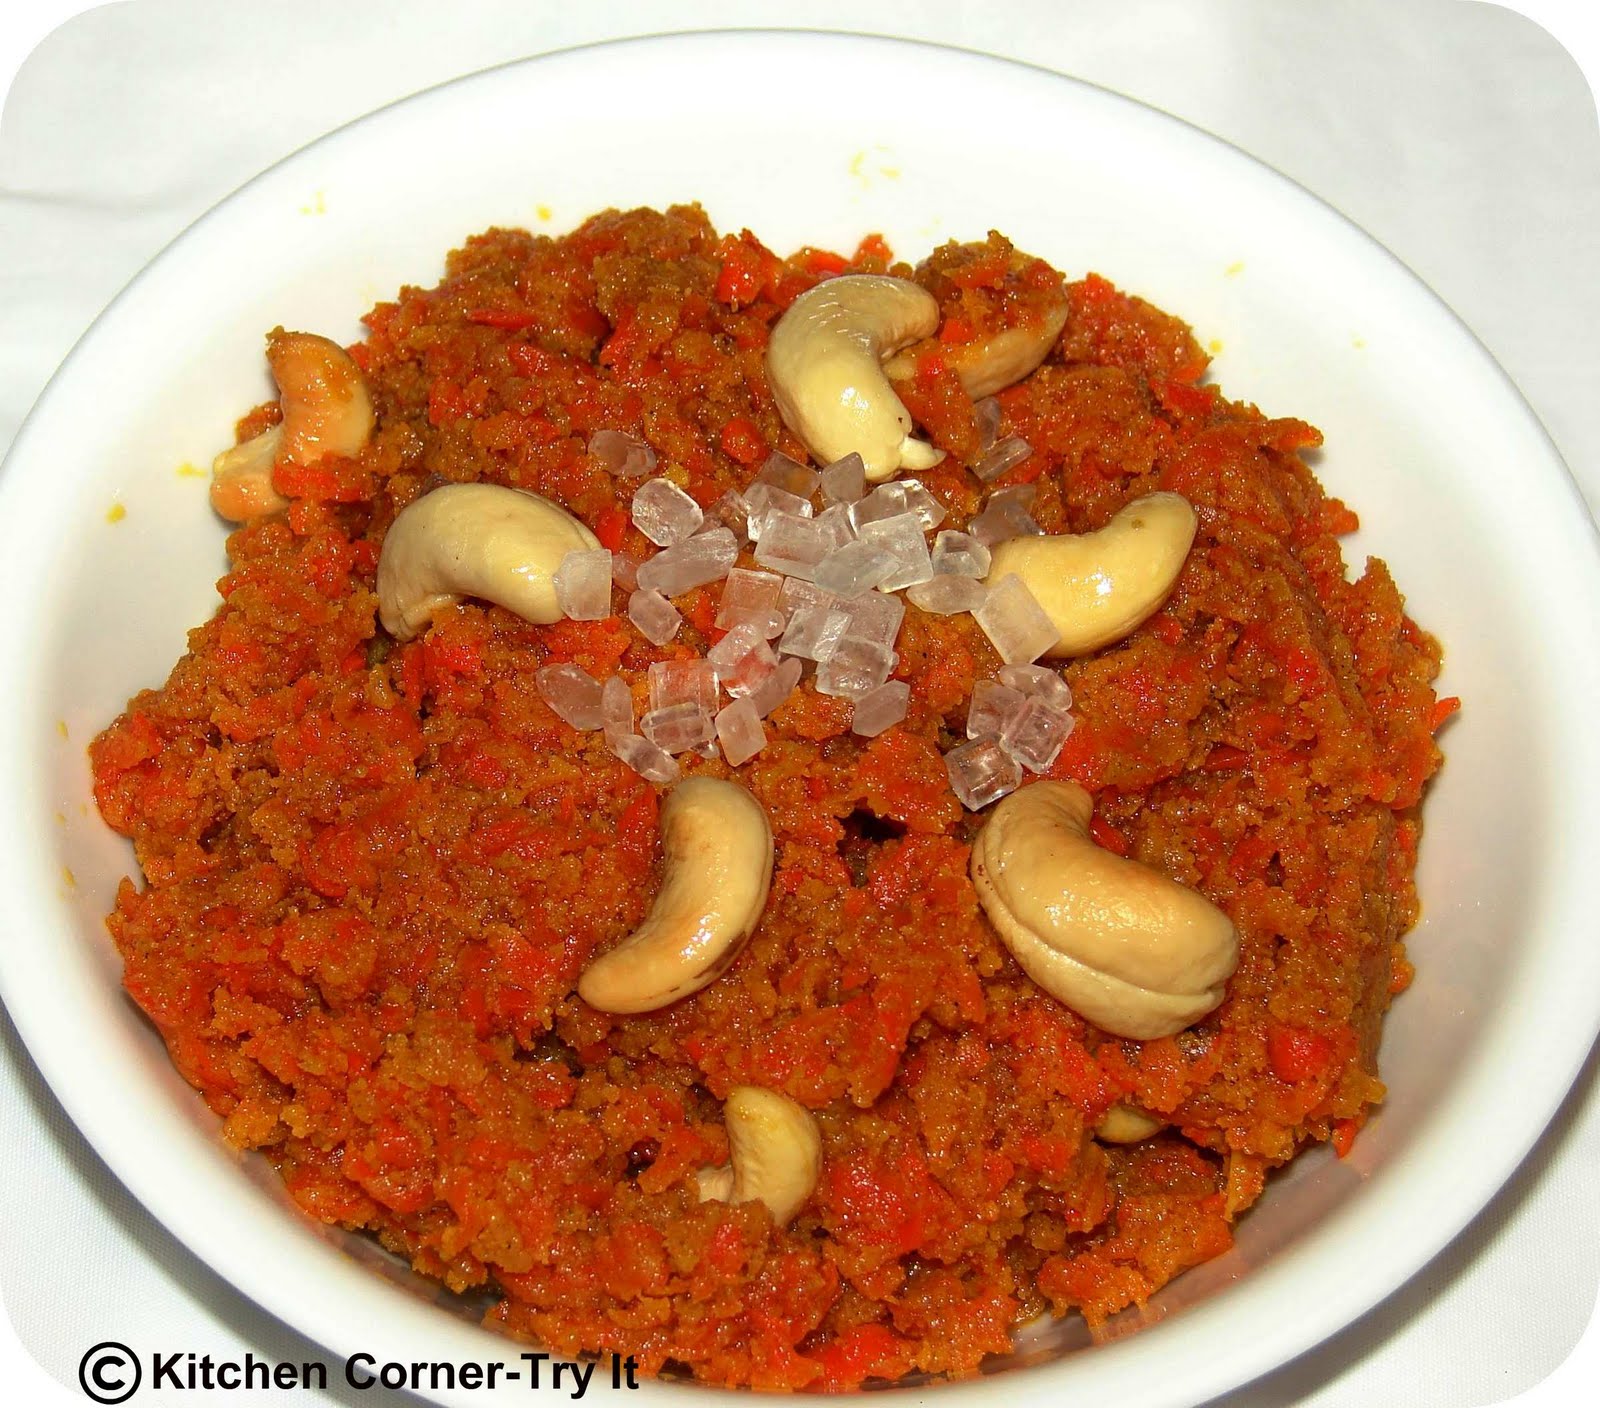
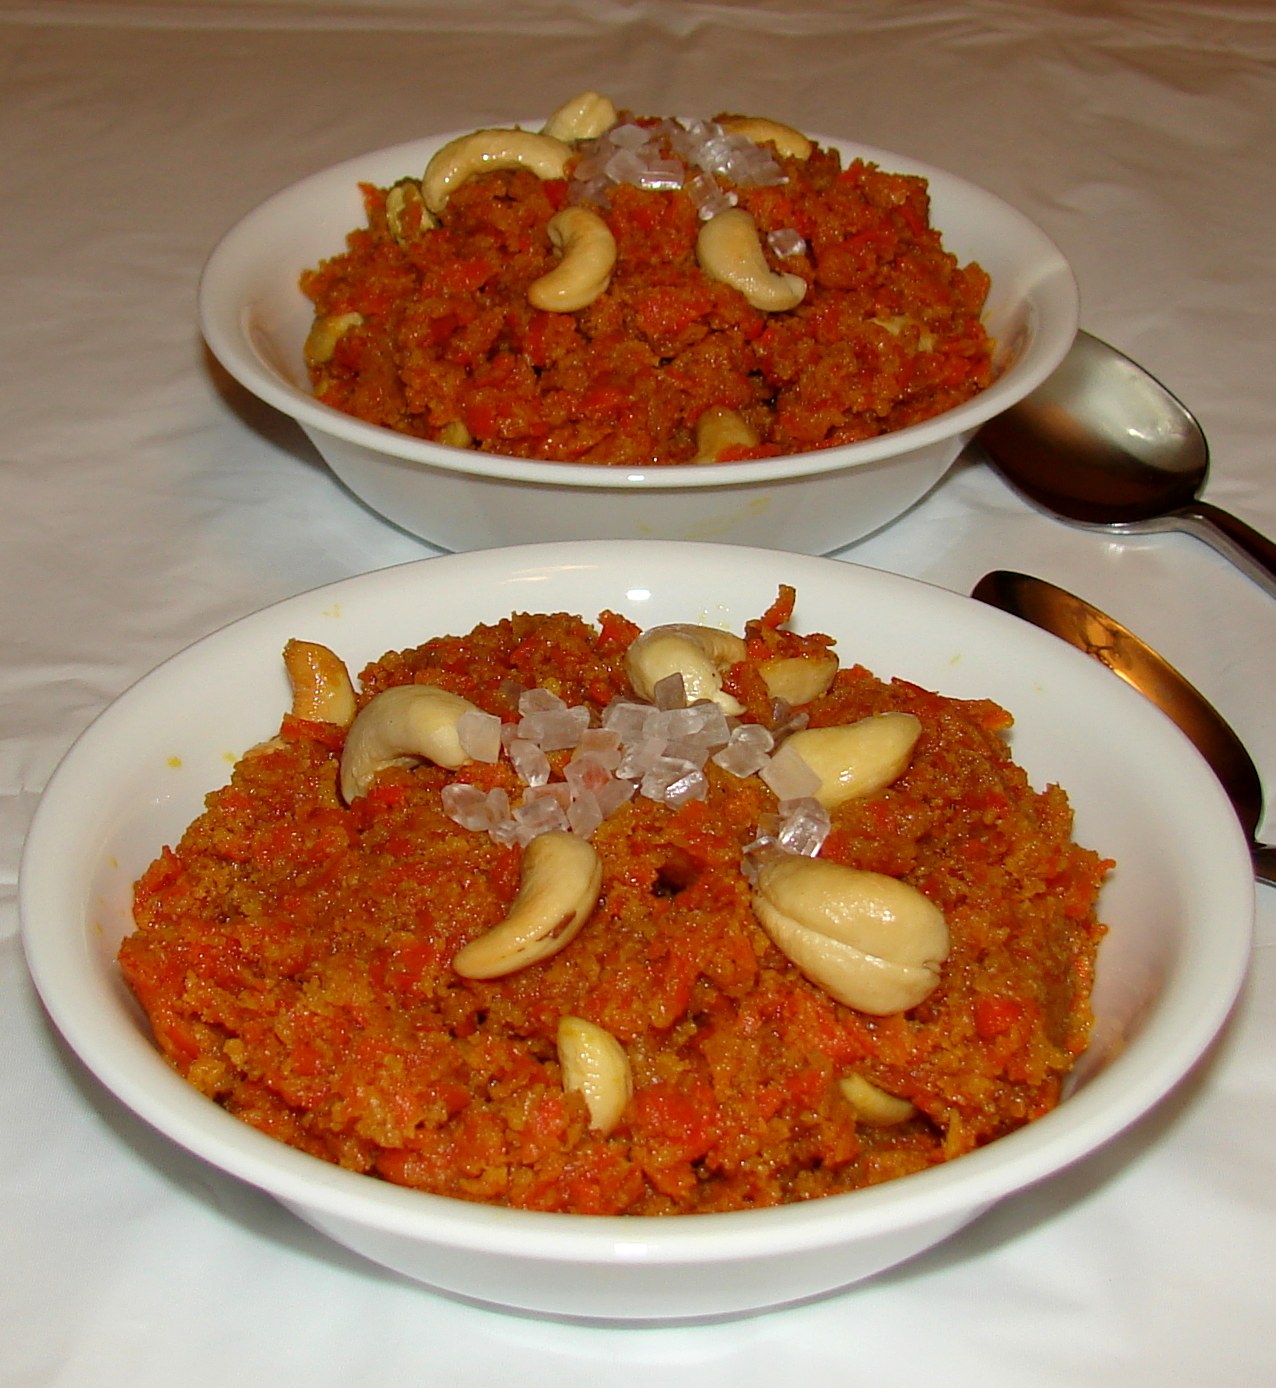
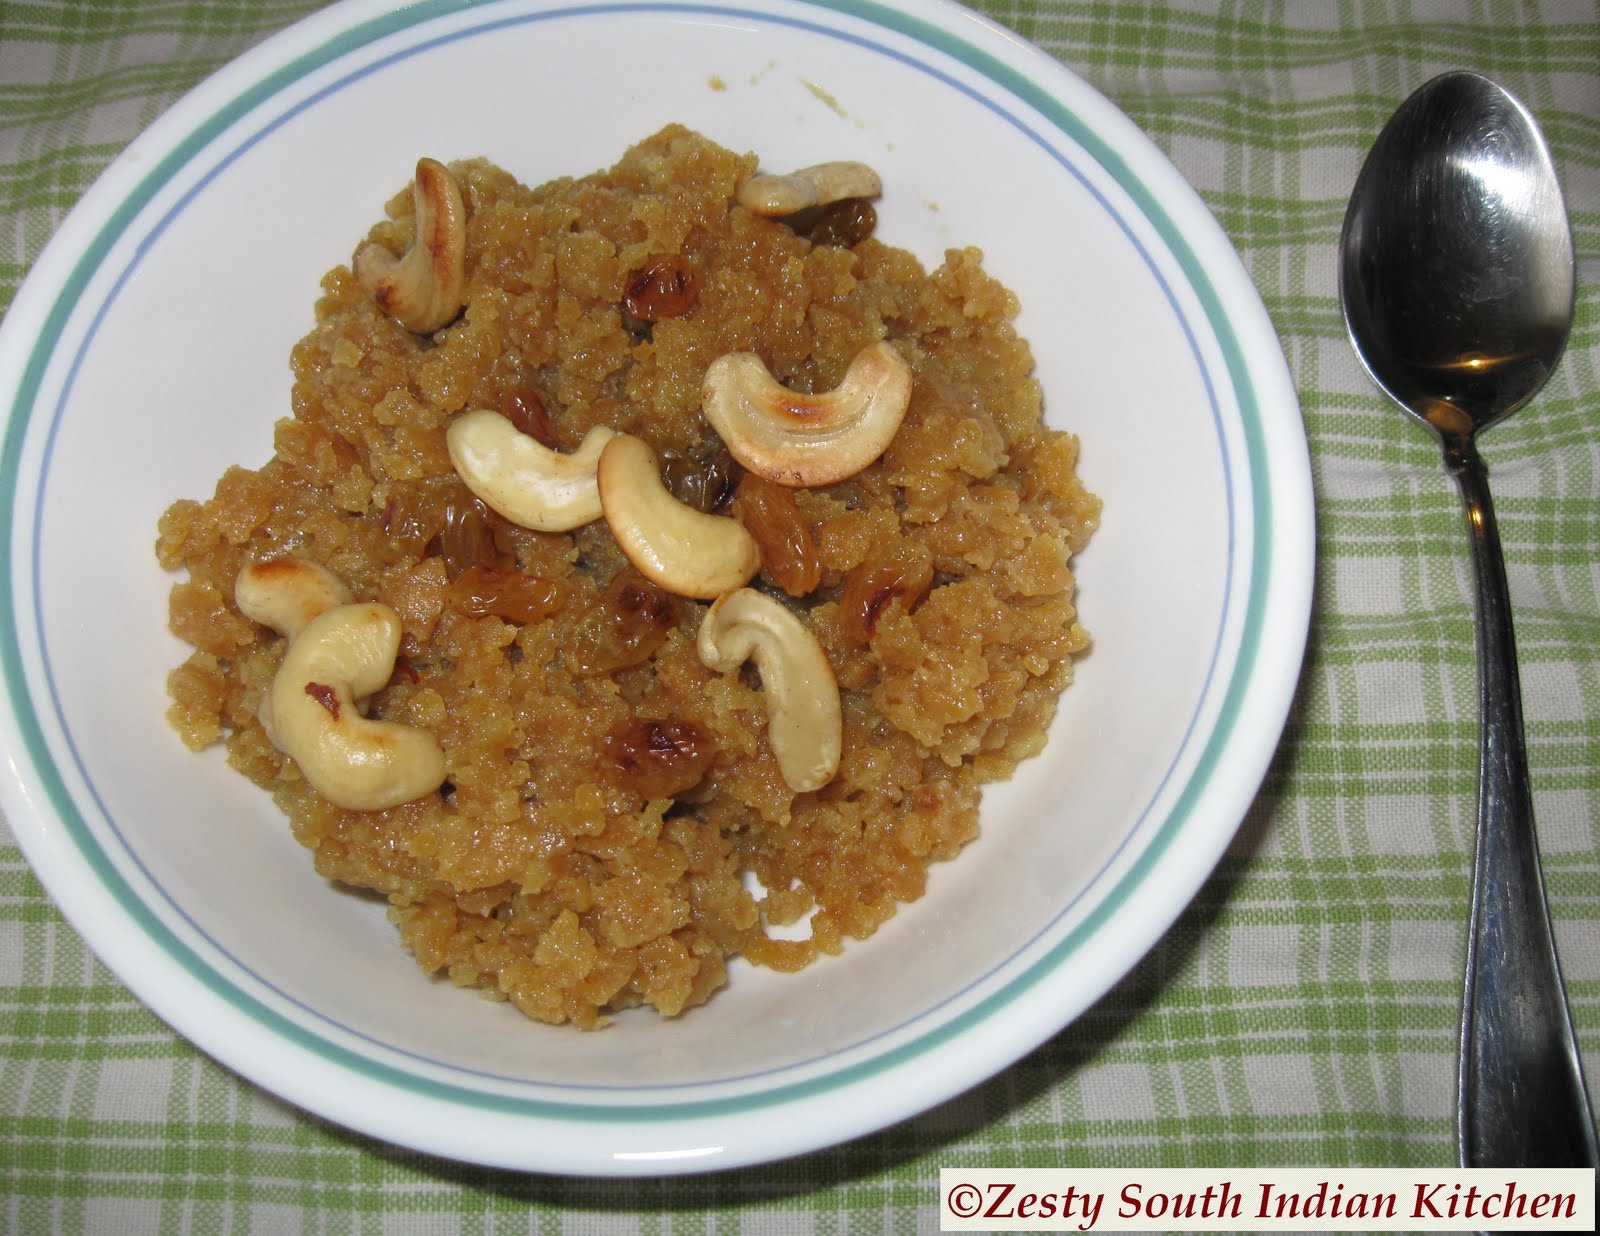
Ariyum parippum pradhaman (Rice and moong beans cooked with jaggery and coconut milk)

Drinks

Karingali vellam/ Chukku Vellam/ Dahashamani. (Boiled water with medicinal herbs and spices)

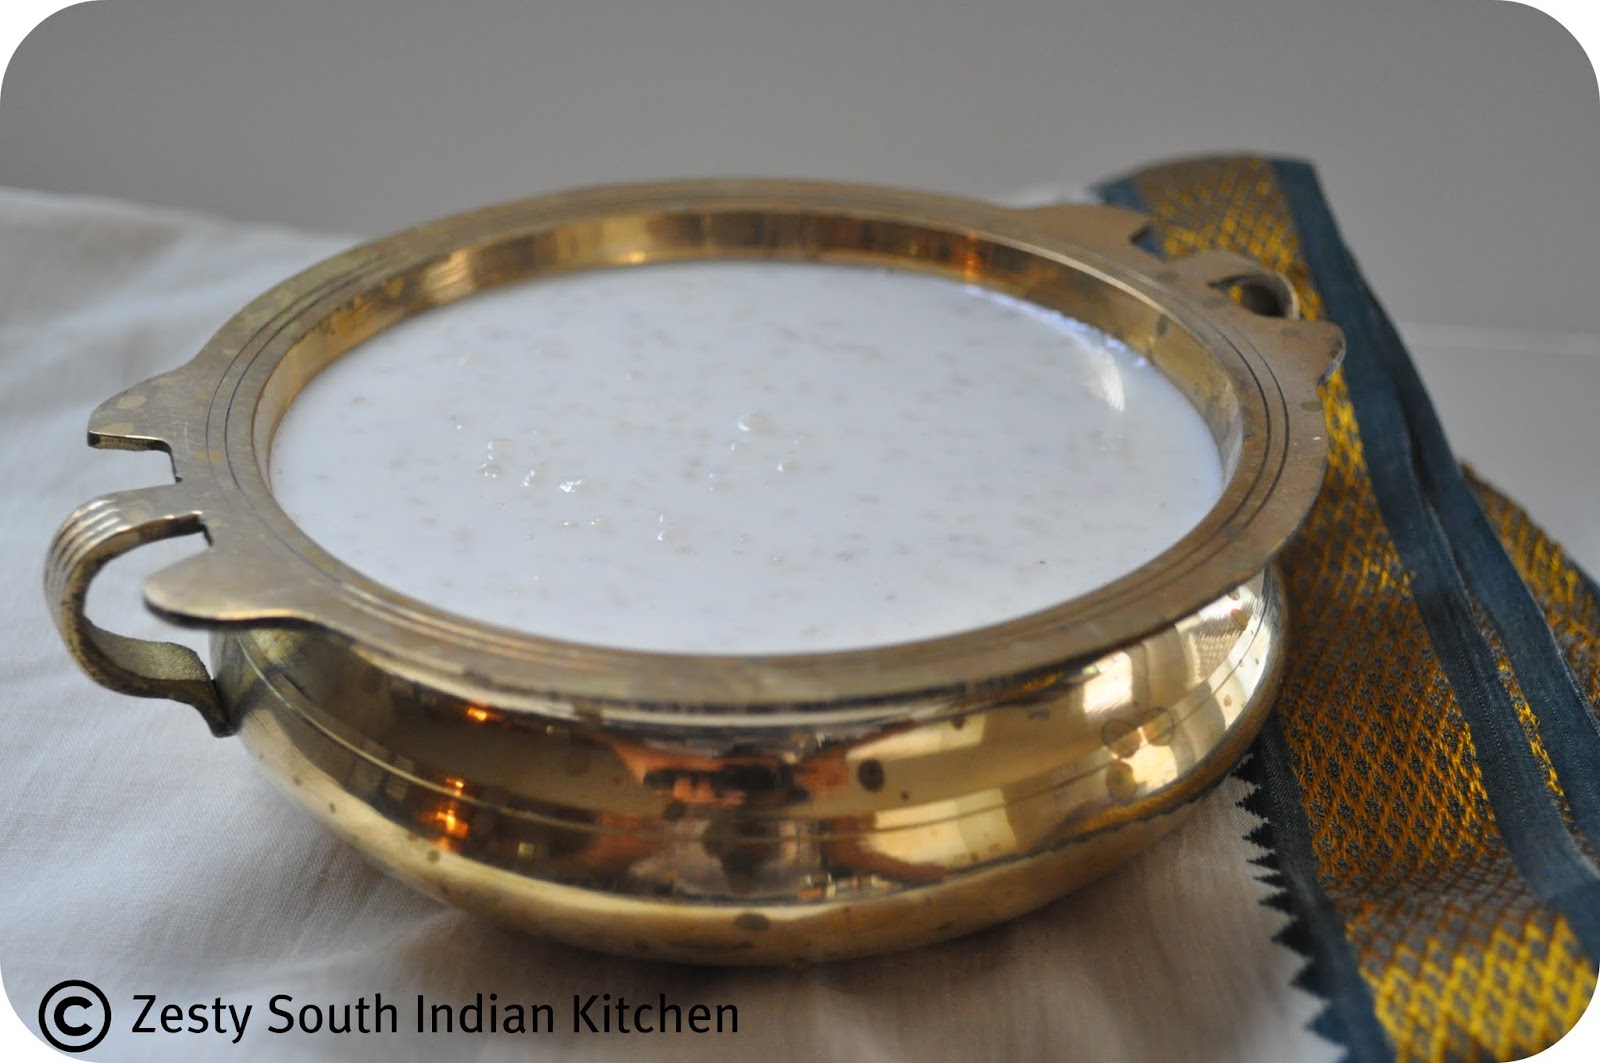
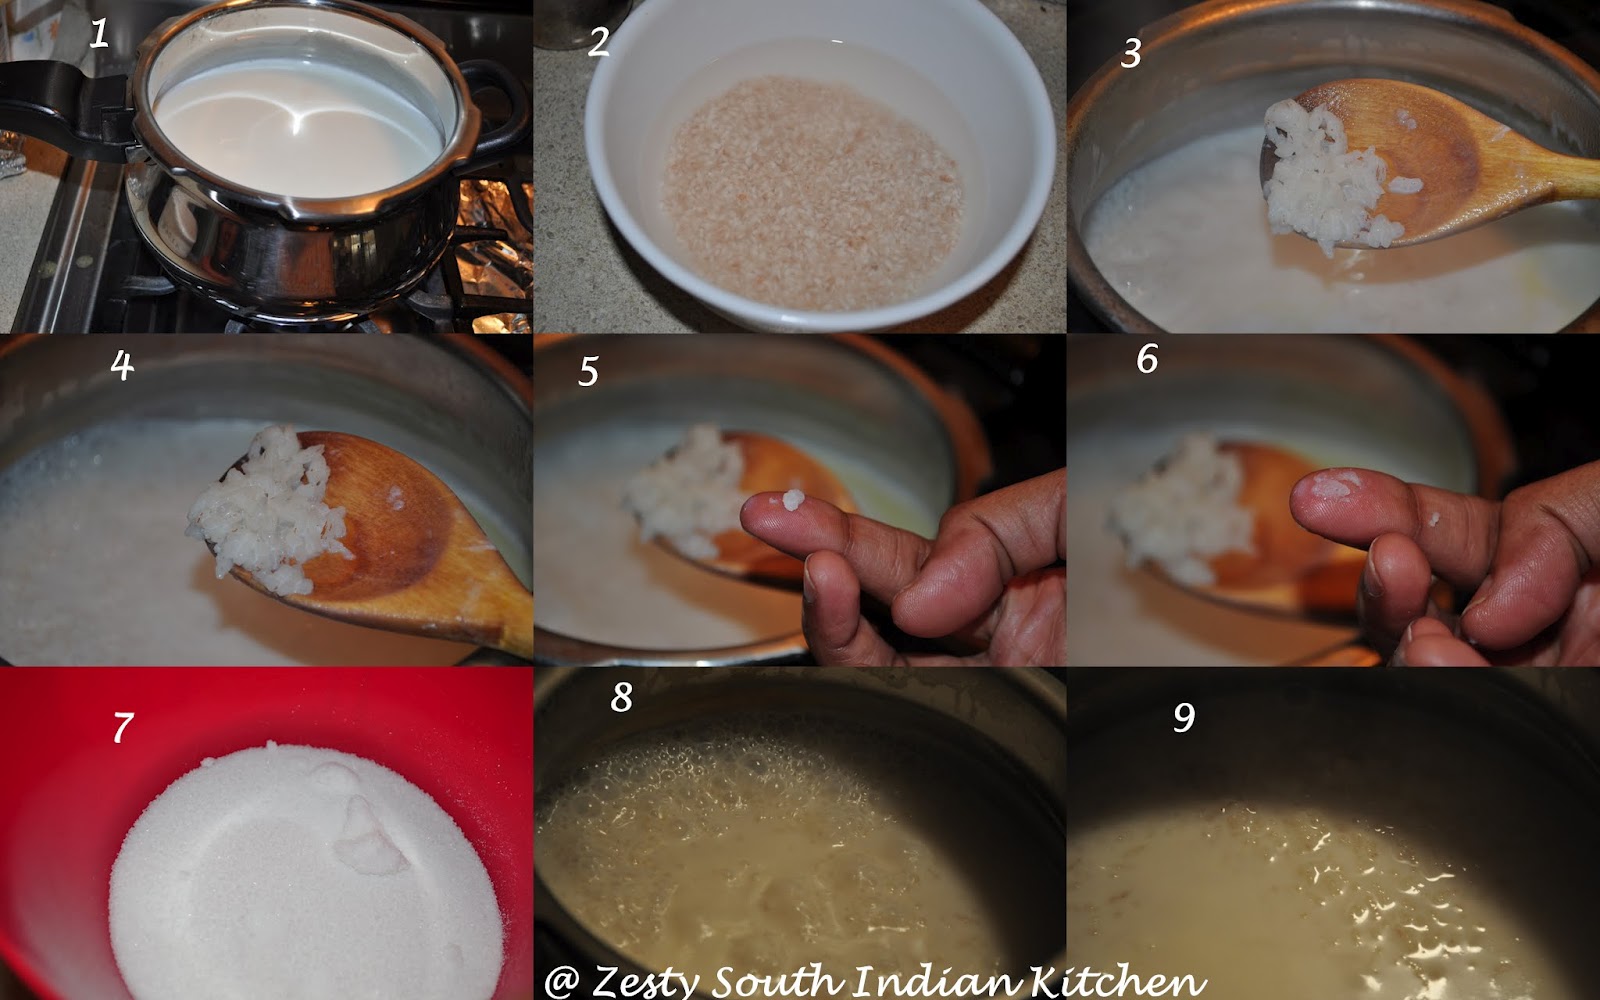
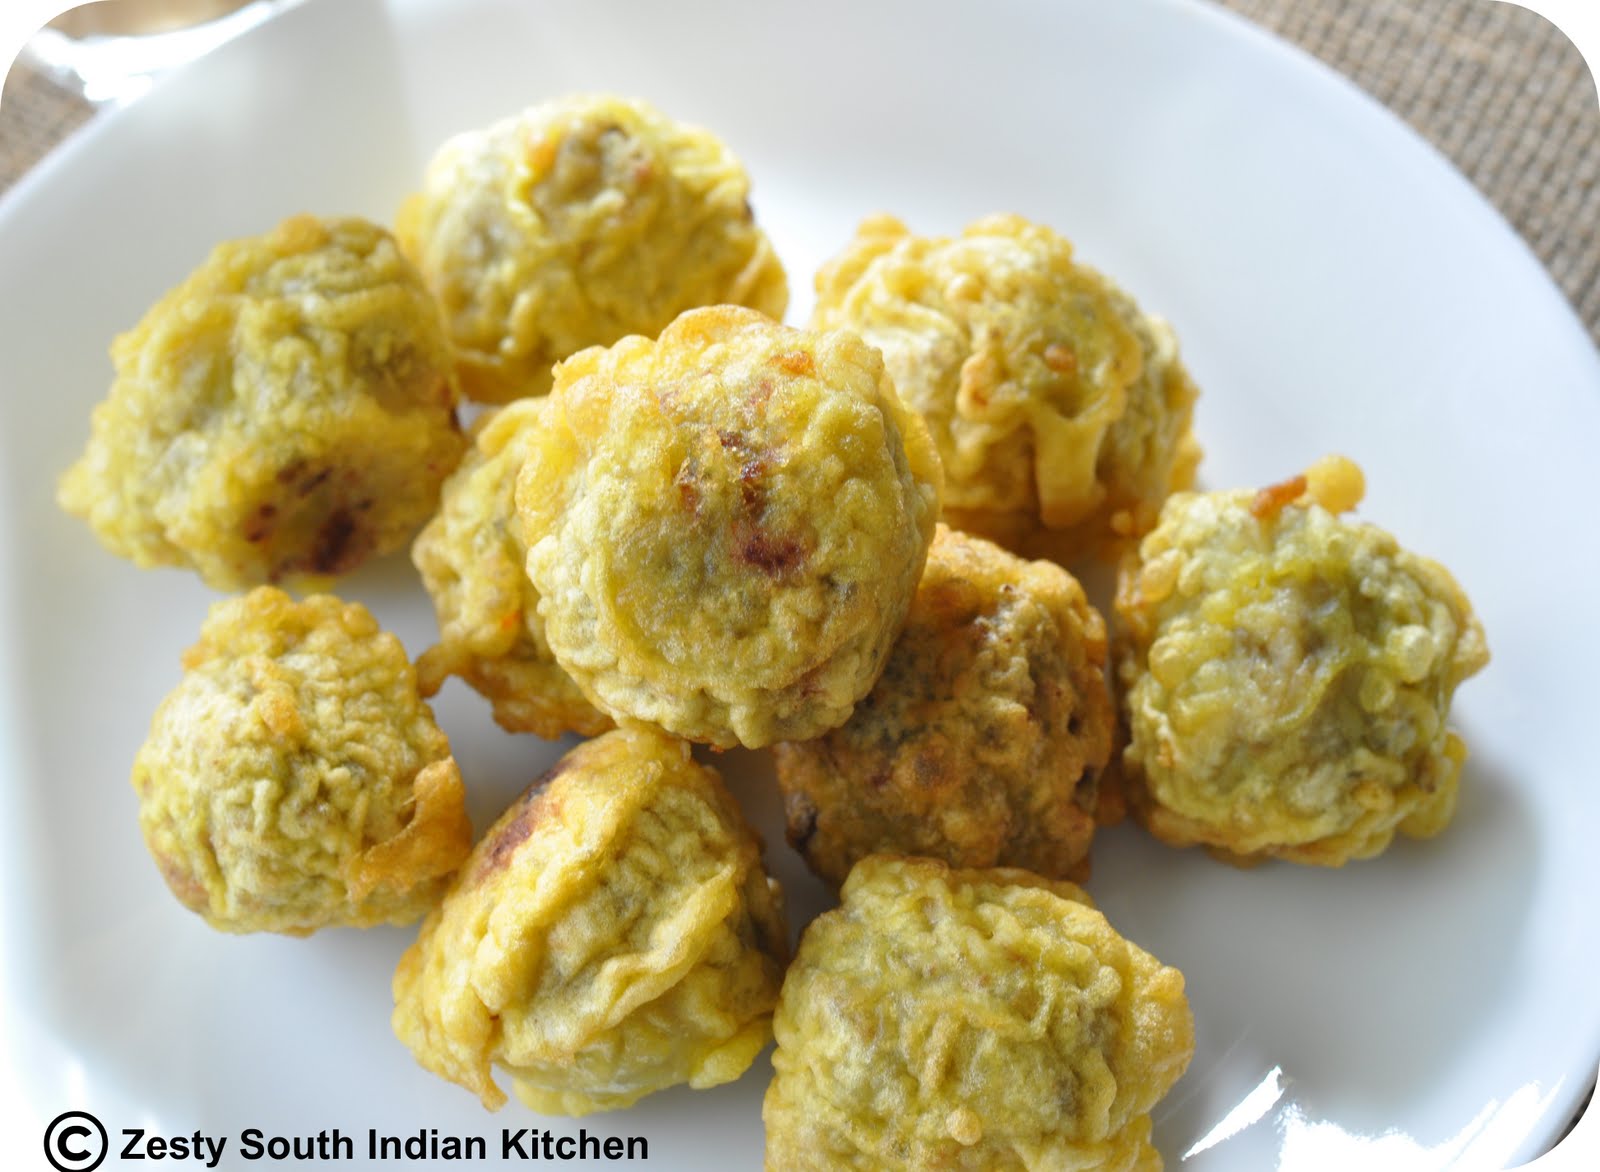
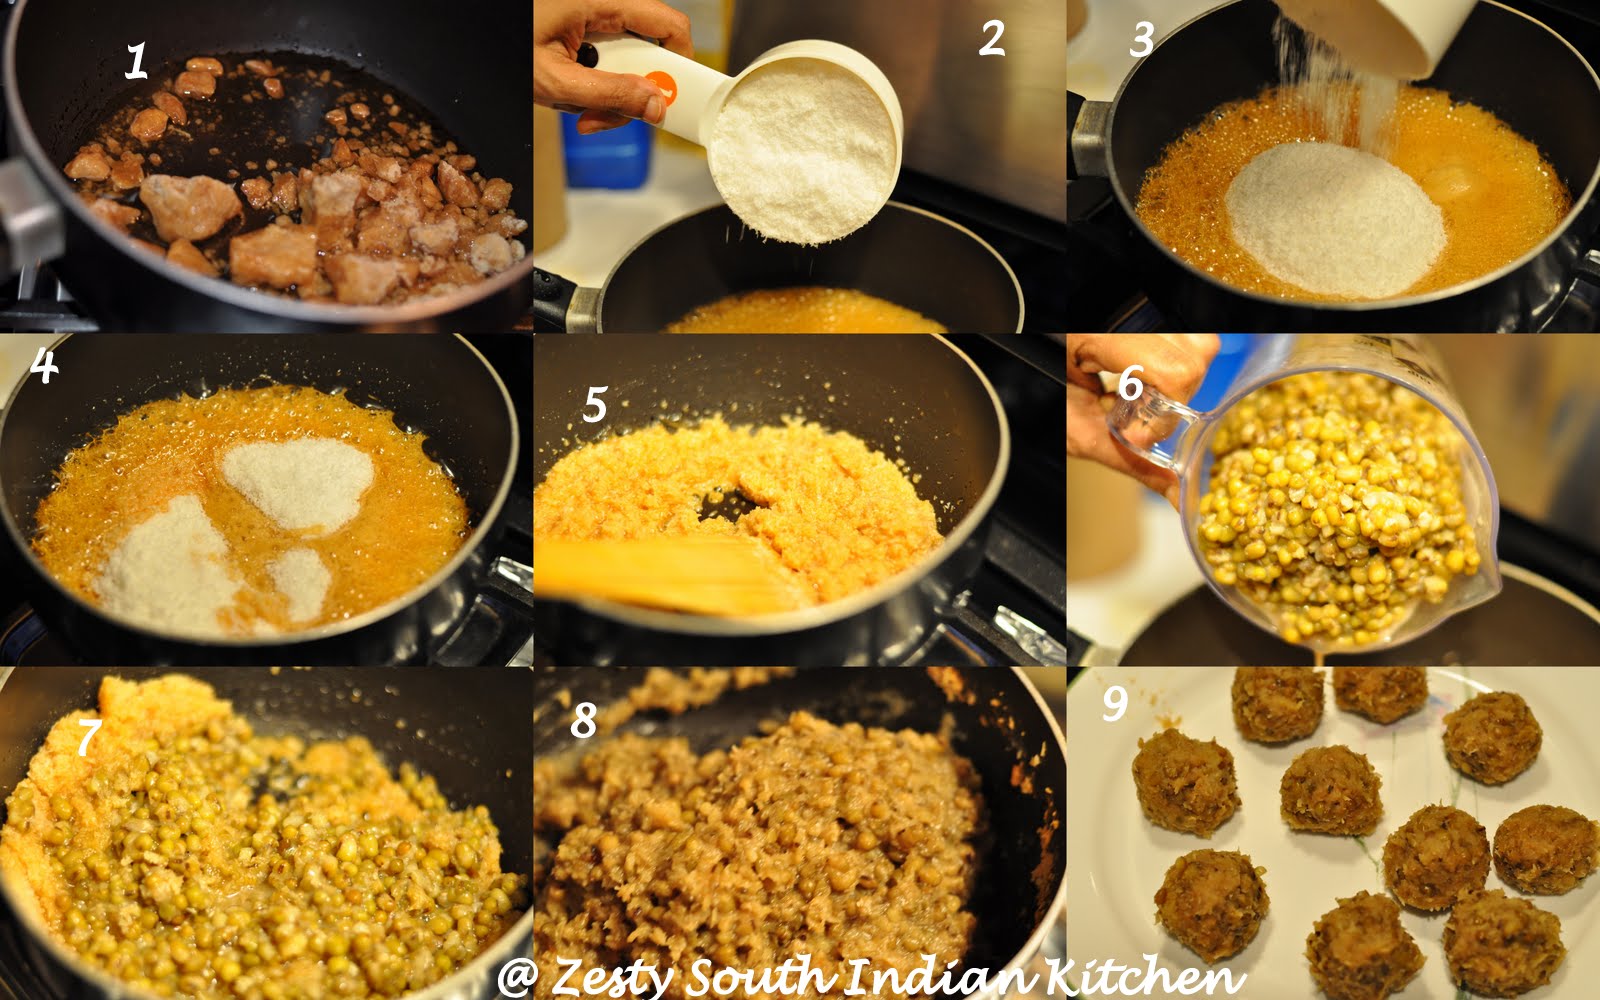
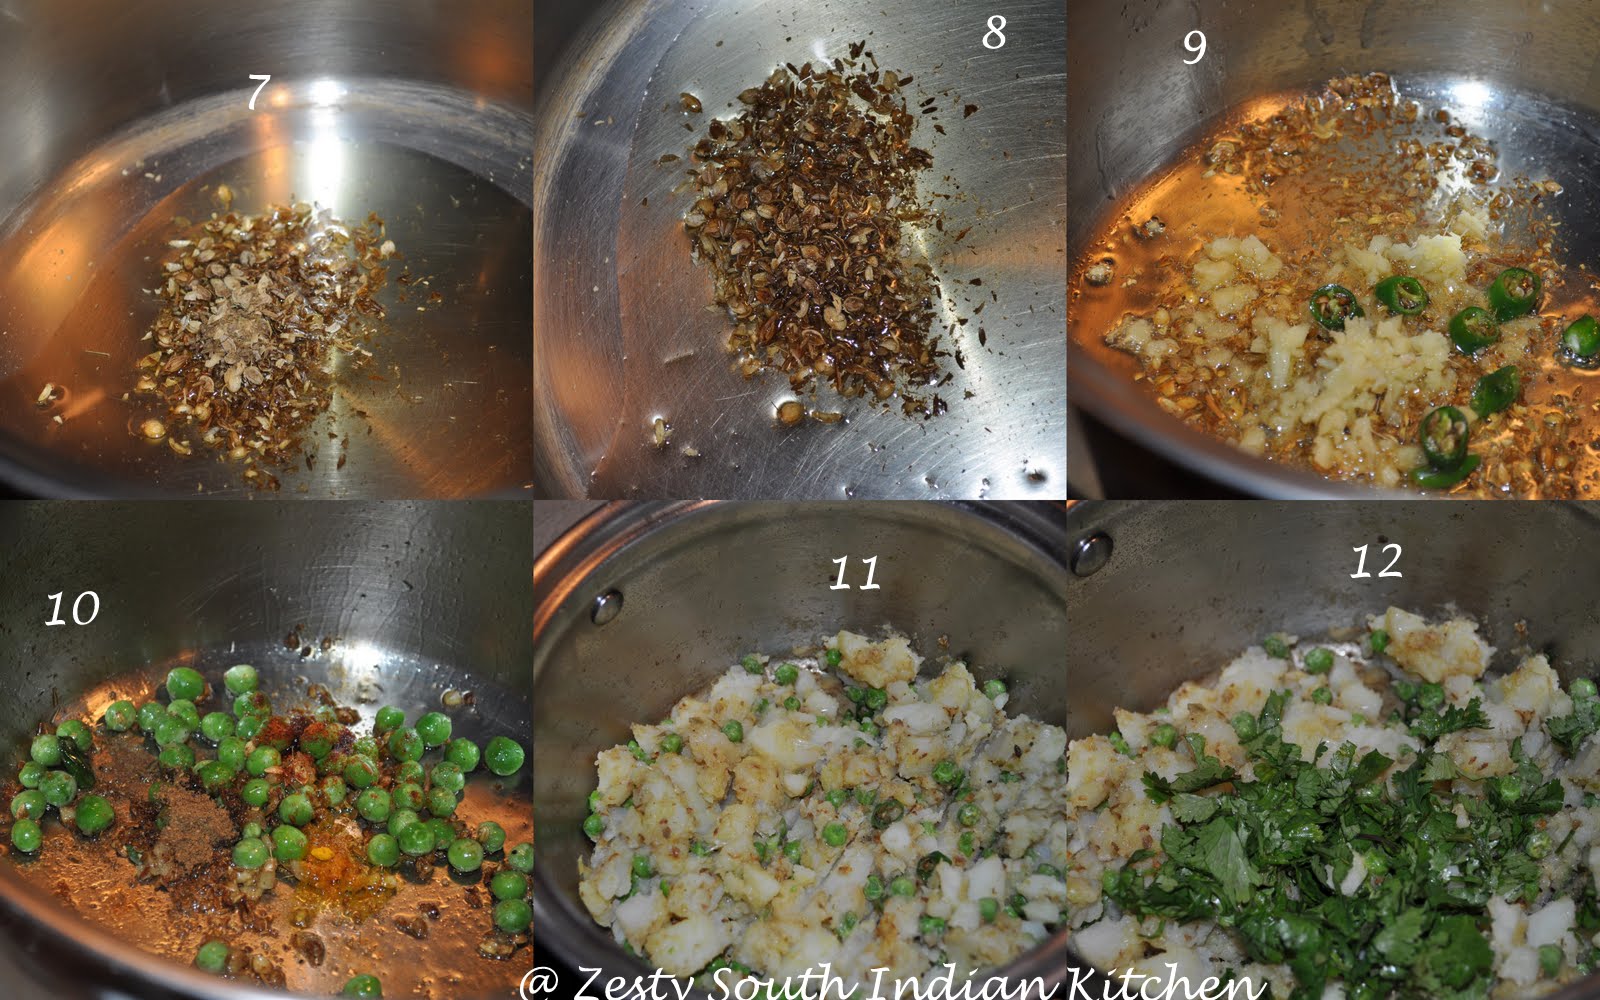
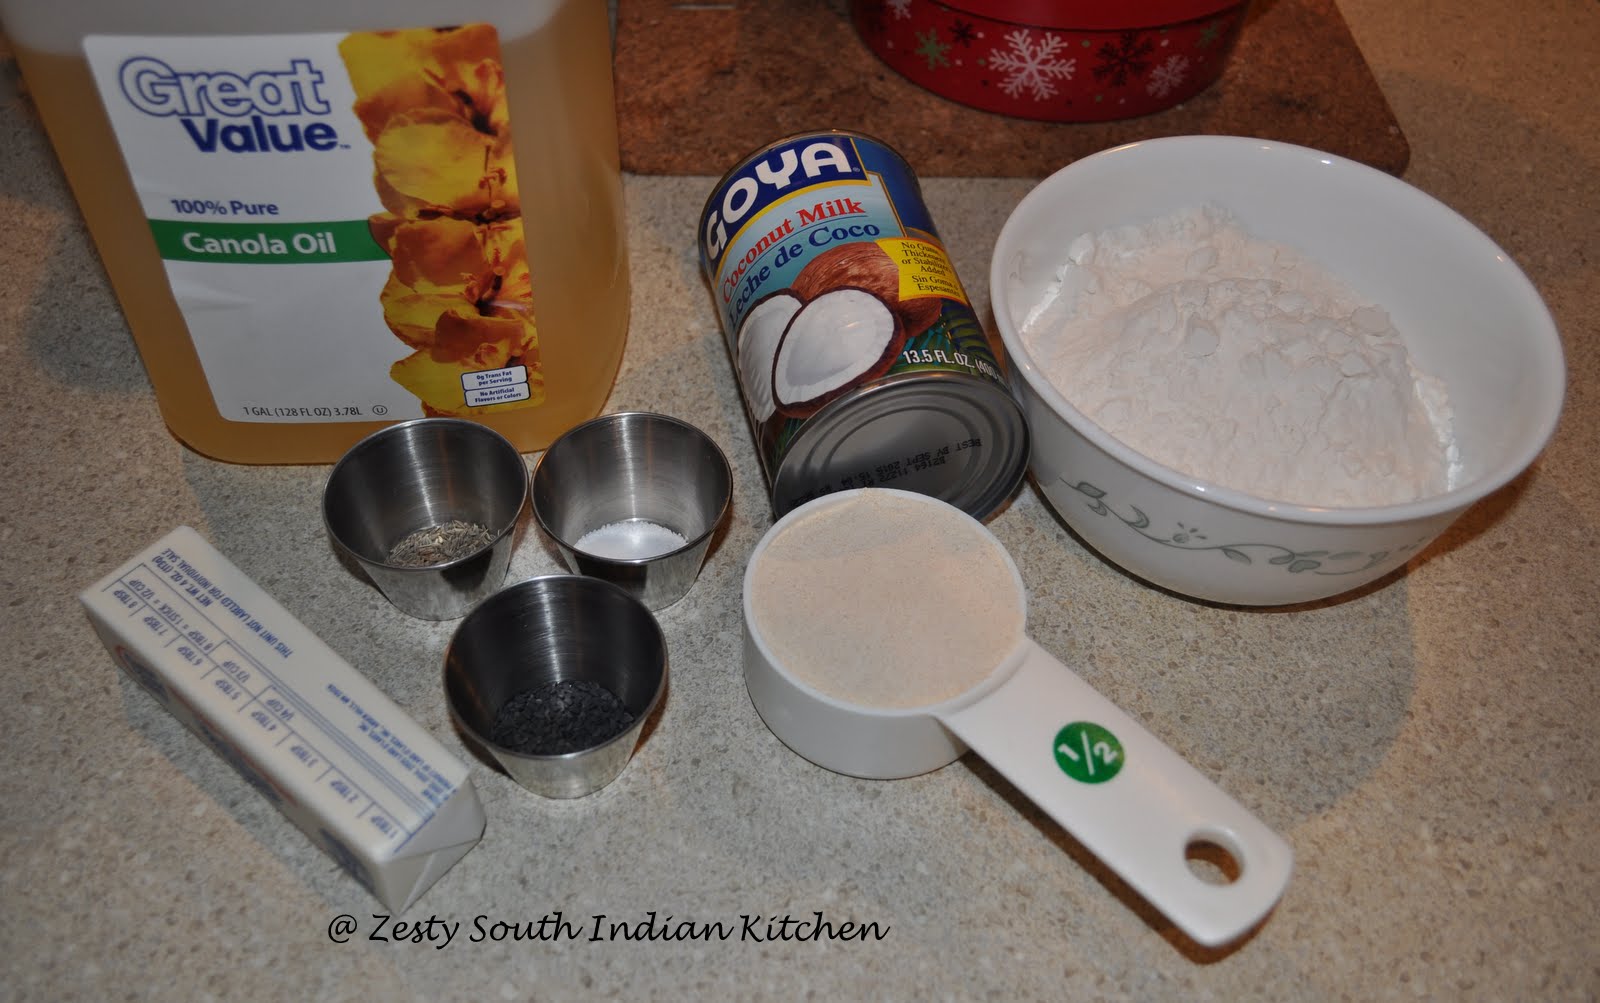
Along with this I am giving the recipe of dessert which I prepared Ariyum Parippum Pradhaman/ Rice and moong beans cooked with Jaggery and coconut milk. This combo can be made as thick pudding when there is no coconut milk is added. I like liquid puddings which amma used make. For this you need first fry the moong dal/ spilt moong beans until it release aroma two or 3 minutes. Then cook with fried moong beans along with raw red rice. Once the rice is cooked then add jaggery /unrefined sugar and cook for few minutes and then add coconut milk in 3 additions, third milk will be more diluted with water, then second one less compared to third and first will be thick milk you extract directly from the coconut without any addition of water. Then spiced with green cardamom, ground ginger, finally garnished with roasted coconut pieces and cashew nuts in Ghee/clarified butter.
Everybody loved the desserts along with other dishes. Here goes the recipe for Payasam.
What you need
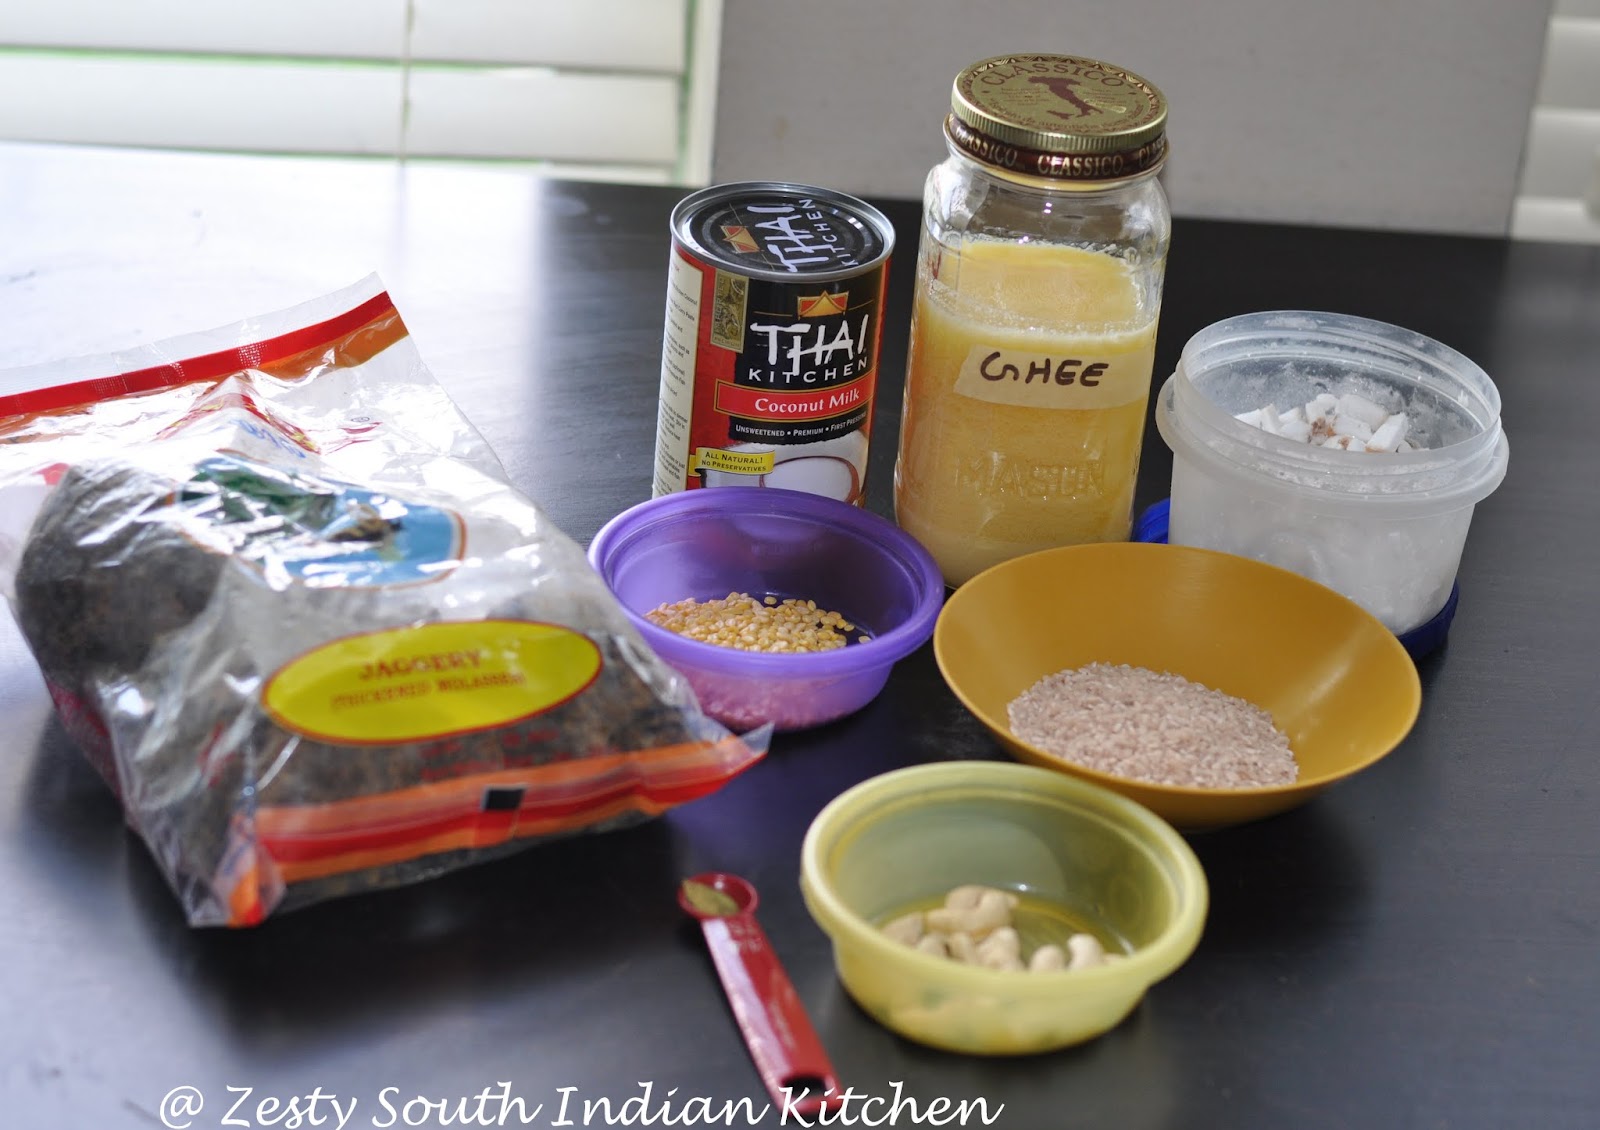
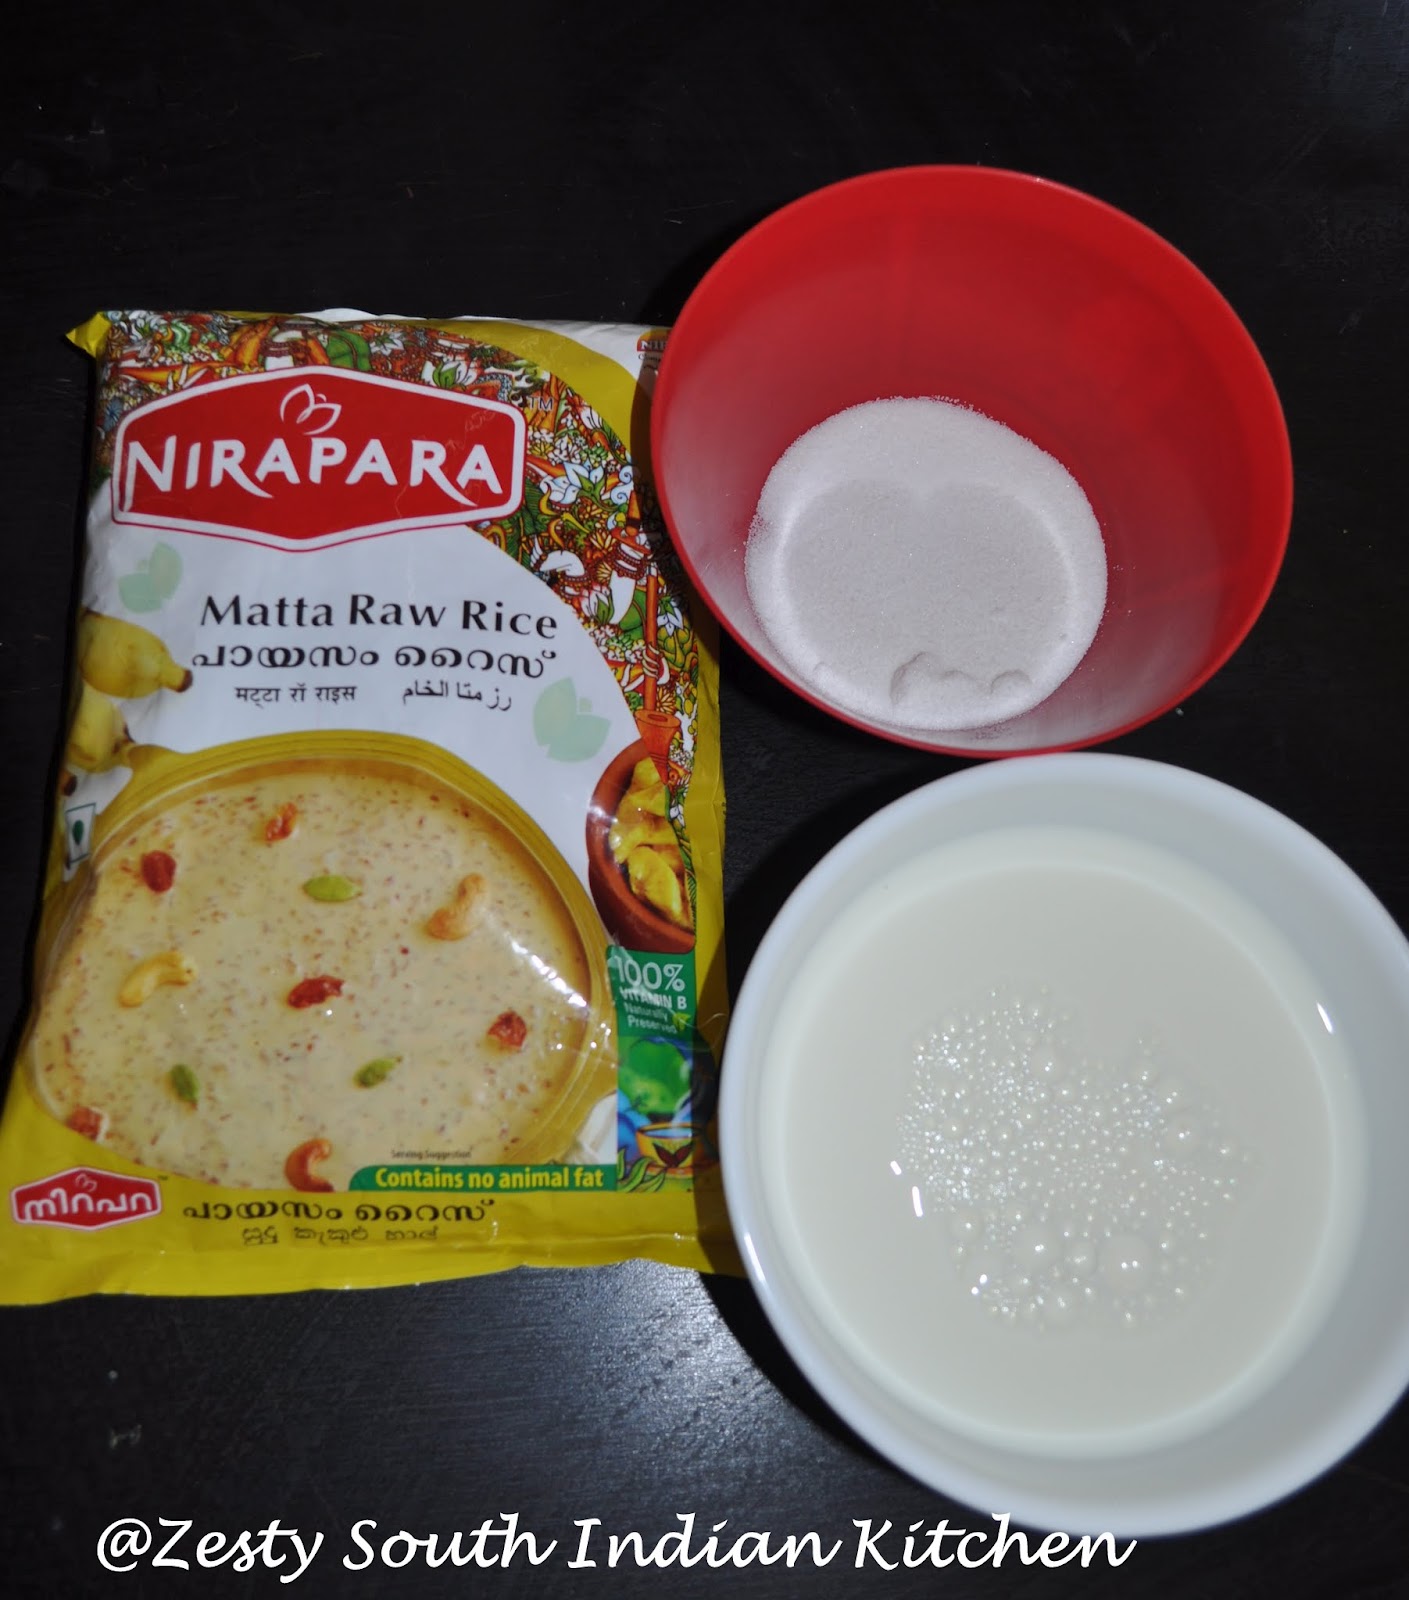
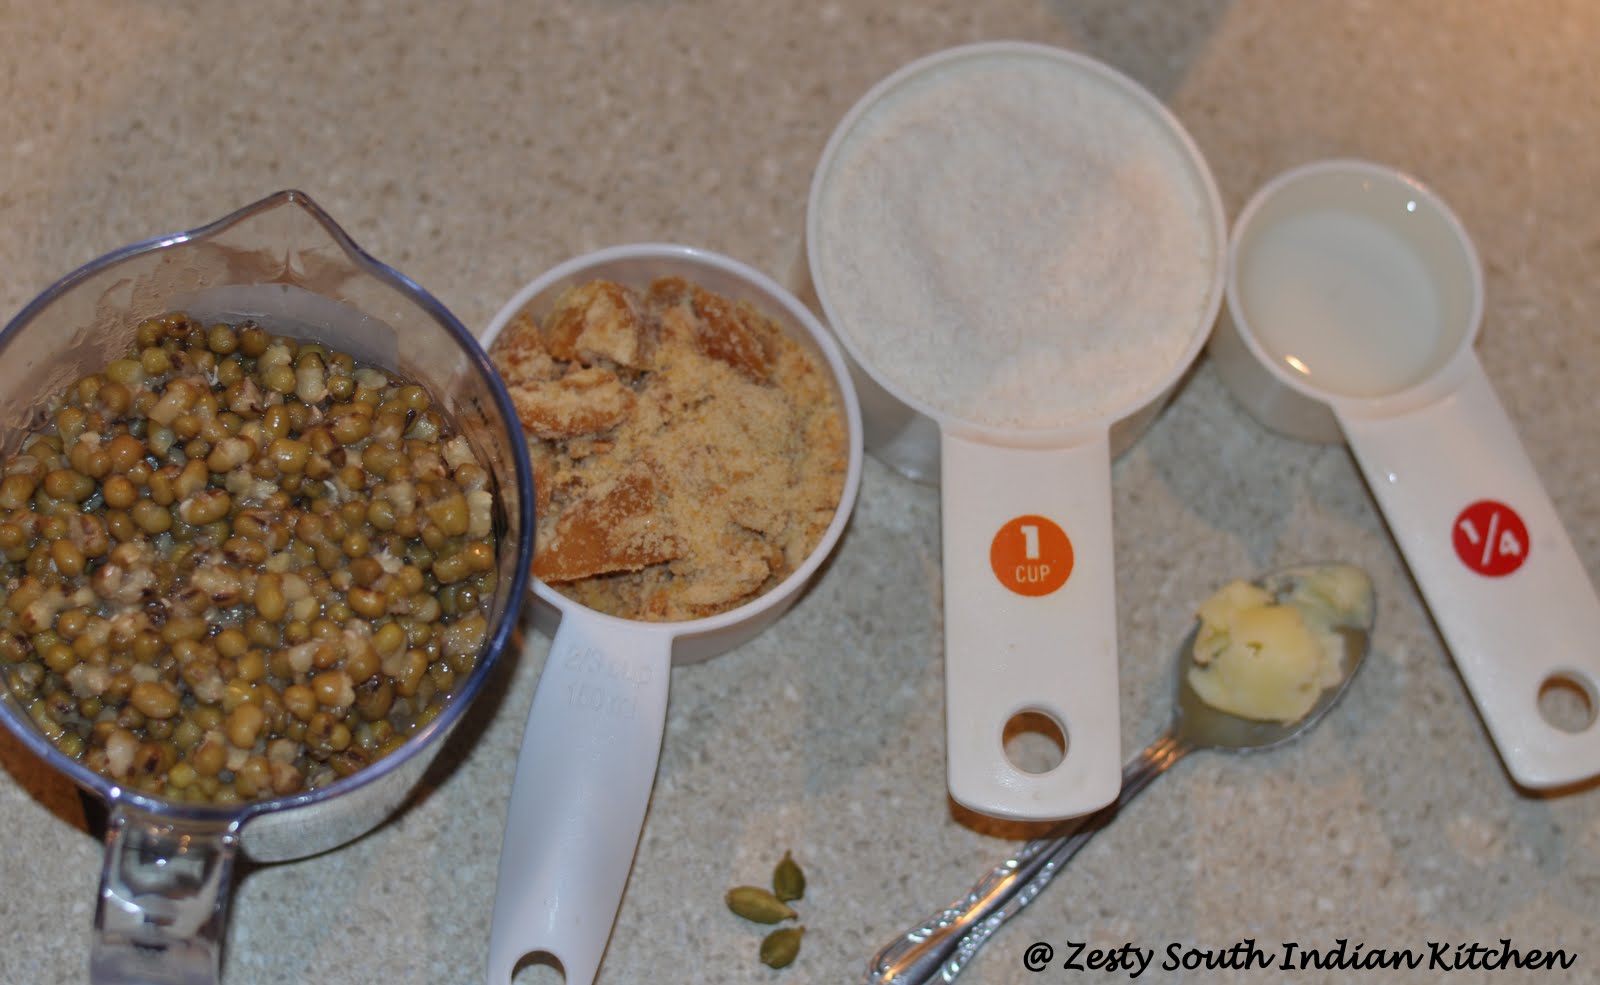
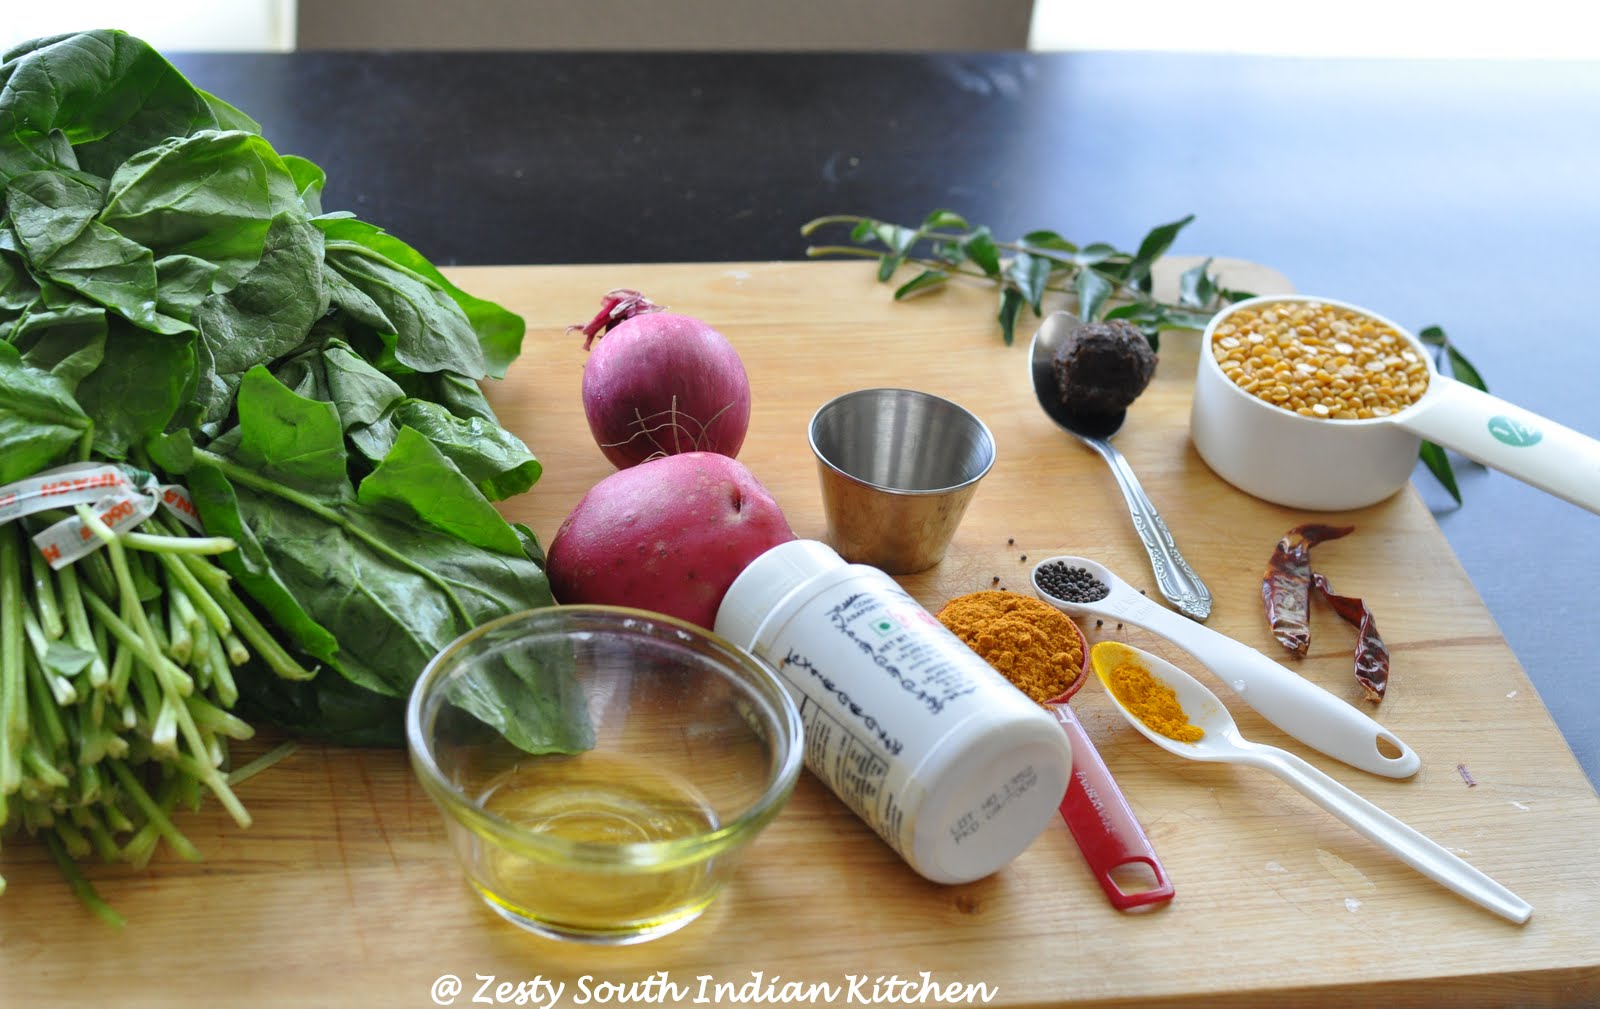
Payasam Rice/Raw Red Rice: ¾ cup
Cheruparippu/Split mung beans: ¼ + ⅛ cup
Jaggery: 1 ½ cup
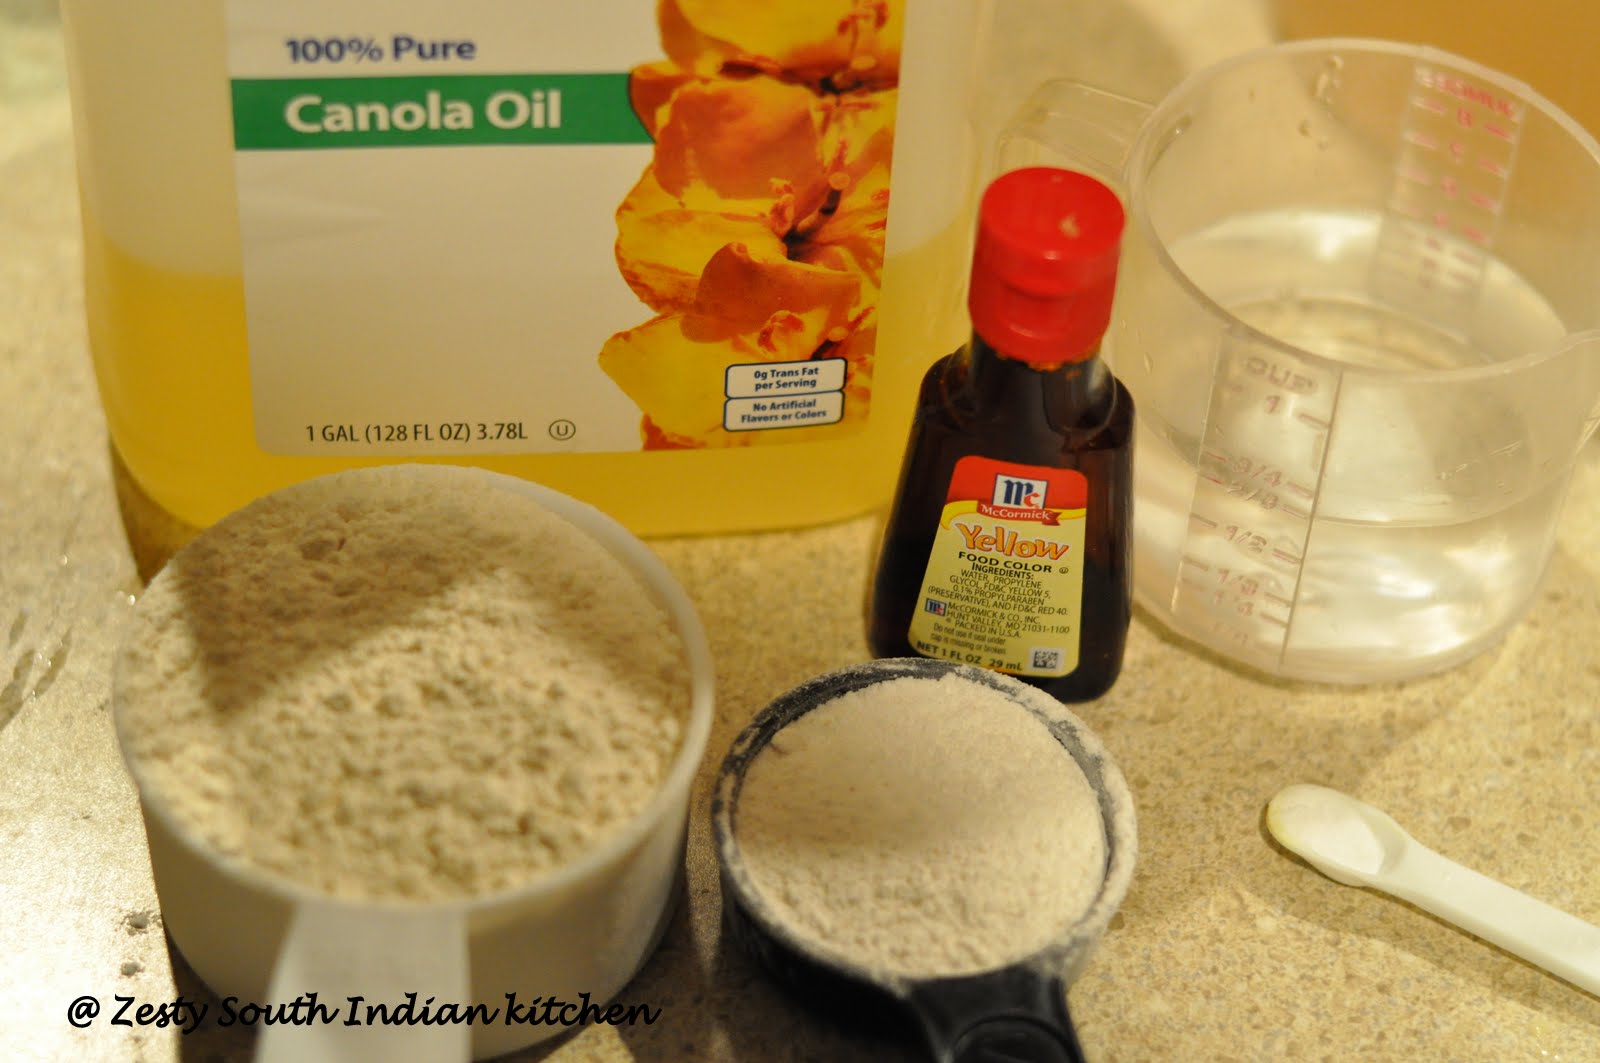
Coconut milk: 1 tin
Water: 5 cups
Cardamom: 3nos
Ground ginger: ¼ teaspoon
Ghee/ Clarified butter: 1 tablespoon
Cashew nut: ¼ cup
Coconut pieces: 2 tablespoon
How I made
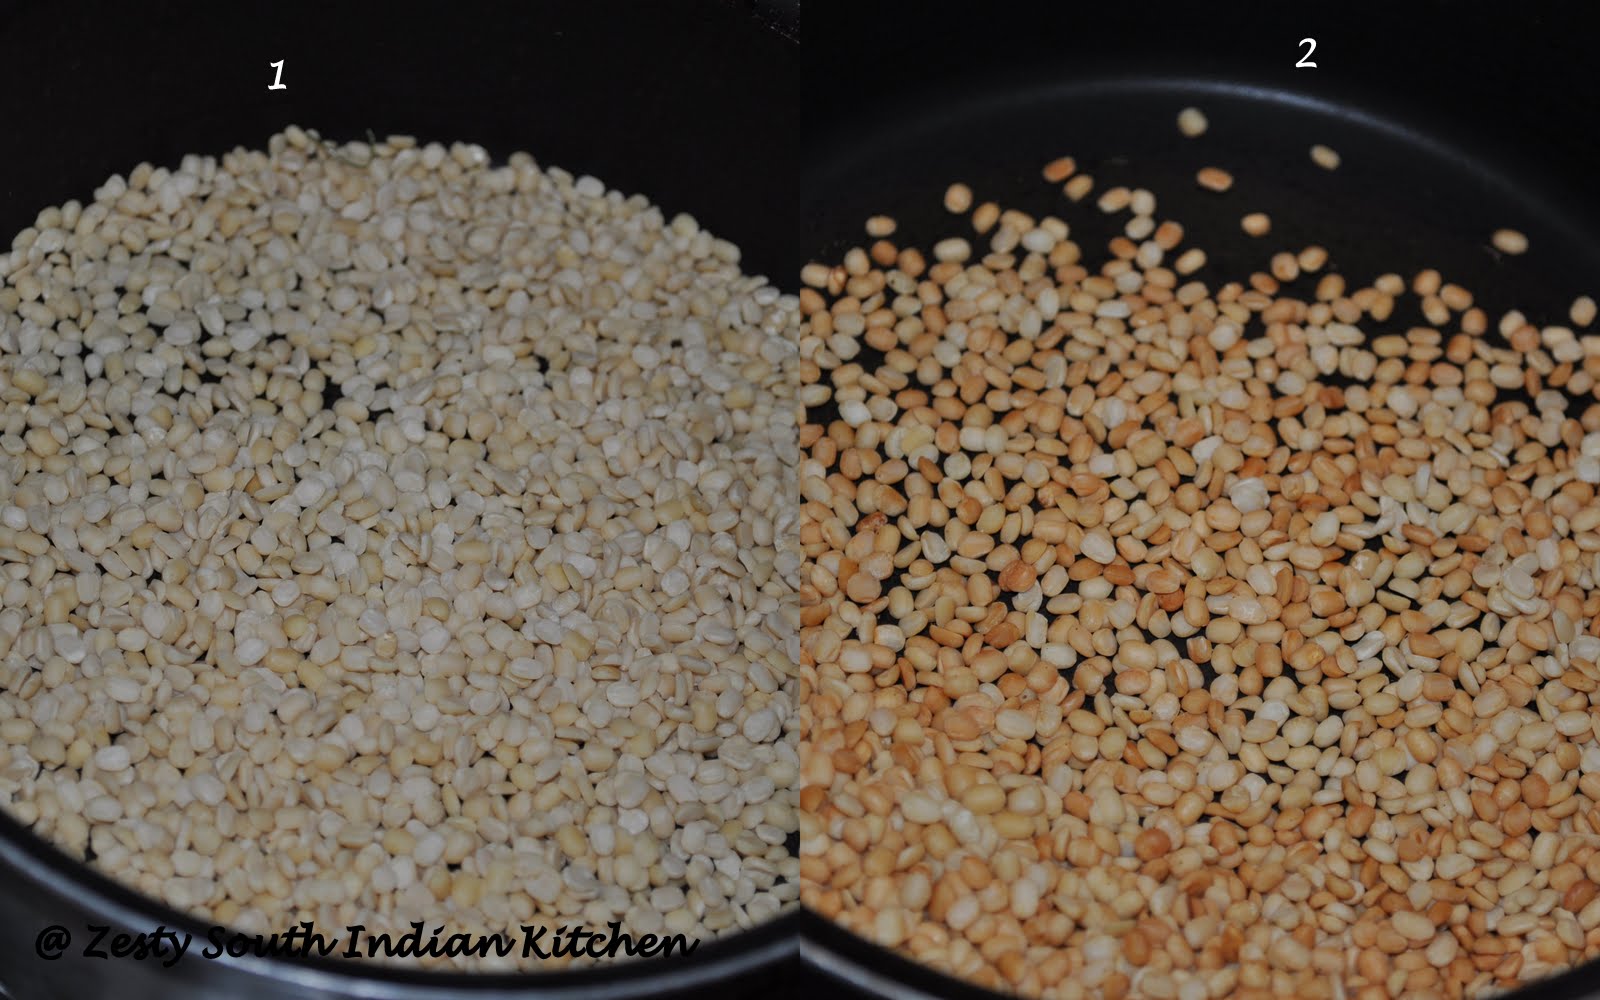
First dry roast the split mung beans for 3-4 minutes or until they become golden brown color and release a nice aroma. Set aside.
In a medium bowl add both rice and roasted moong beans and wash 2-3 times and set aside.
In the mean time in another pan heat jaggery with ¼ cup water and bring it to boil so that jaggery get melted completely. Strain and remove the impurities and set aside Jaggery water.
In a thick bottom pan add both rice and moong beans and add 4 cups of water and cook for about 25 minutes and then add jaggery water to it. Cook the rice mixture with jaggery water for another 3 minutes.
To rice- jaggery- mixture add ¼ cup coconut milk with ¾ cup of water and cook for another 3 minutes. Then add ½cup coconut milk + ¼ cup water and cook for another 3 minutes. Then add crushed cardamom and ground ginger and rest of coconut milk. Once you add thick coconut milk switch off the flame.

In a small skillet add Ghee and fry coconut pieces and cashew nuts until both turn golden brown and switch off the flame. Add this fried coconut pieces and cashew nuts to Payasam mixture along with ghee.
Enjoy as much as you wish.

Preparation time: 40 minutes
Yield: 10 serving
Verdict: Yummy
Food was served in Banana leaves. Our Friend and my hubby’s co-worker Emanuel as well as neighbor and friend Yolanda and her daughter Makayala joined the party along with my family.
The party began at 7.45 PM and we were having fun till 10.30 PM.
Thanks to Food buzz for giving this wonderful opportunity to feature Kerala cuisine in May edition of 24X24.


